Download
the PDF file to view the complete installation instructions including pictures.
 Download PDF (142K) Download PDF (142K)
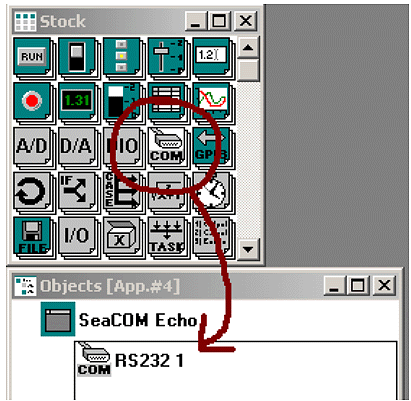
Serial I/O Card Installation It is very easy to use any SeaCOM
RS-232 or RS-422 card with TestPoint. Install the card as per the directions in SeaCOM.hlp
or your manual, and use the device manager to find out what port(s) the card is installed
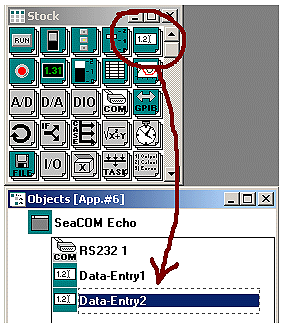
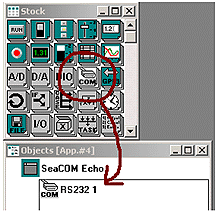
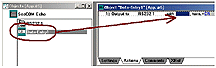
as. First drag a "RS232" icon into the objects list.
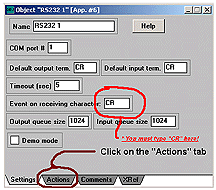
Double Click on the
"RS232 1" listing to bring up the properties dialog box.
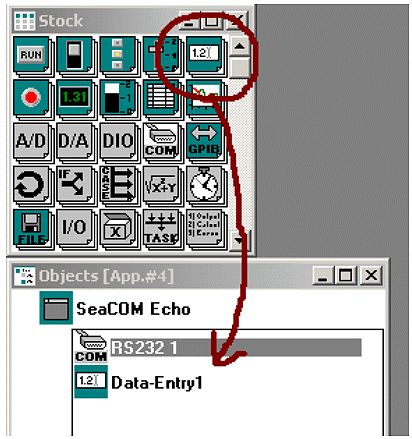
Change the "COM
#" box to the com port that will be used, and all other parameters can be left on
default.
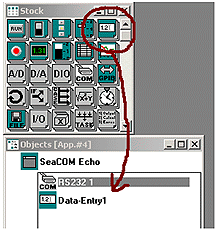
Now drag the icon "Data-Entry" into the objects list.
Double click on
"Data-Entry1" listing to bring up the properties dialog box.
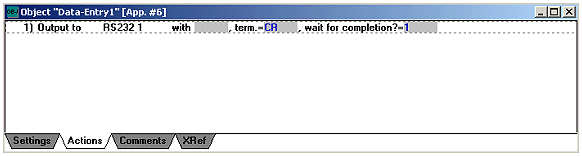
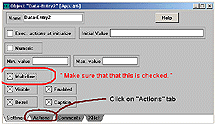
Click on the
"Actions" tab.
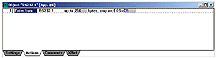
Then click on the "Actions" tab and drag the "RS232 1" from the
objects list to the action screen. A popup menu will appear, select the "Output
to" option.
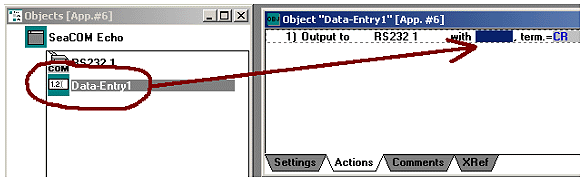
Drag the
"Data-Entry1" from the objects list to the "RS232 1" output box.
Now that we have the
output stage complete, lets work on the input stage. Now drag the icon
"Data-Entry" into the objects list one more time.
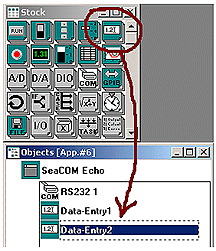
Double click on
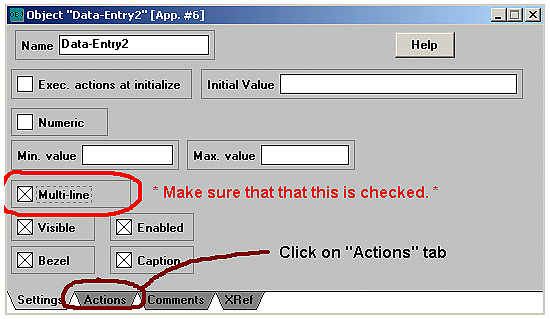
"Data-Entry2" in the objects list to bring up the properties dialog box. Select
the Multi-line option and then select the "Actions" tab.
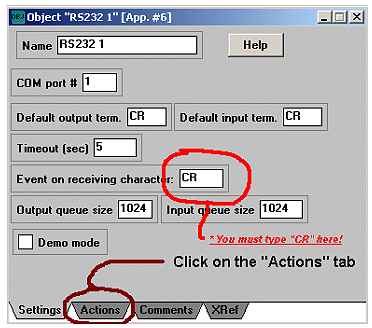
Double Click on the
"RS232 1" listing to bring up the properties dialog box. * Make sure that you
type "CR" in the "Event on receiving character:" box.
Then click on the
"Actions" tab and drag the "RS232 1" from the objects list to the
action screen. A popup menu will appear, select the "Enter from" option.
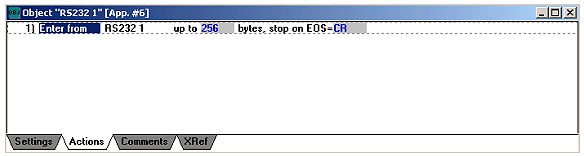
Now drag the drag
the “RS232 1” from the objects list to the action screen. A popup menu will
appear, select the “Enter from” option.
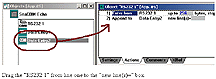
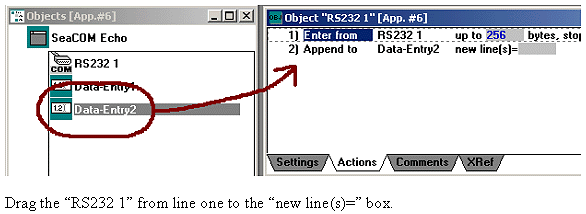
Drag the “RS232
1” from line one to the “new line(s)=” box.

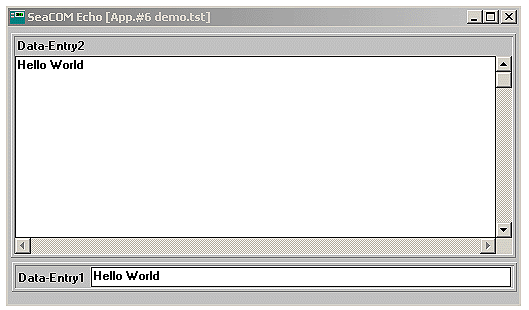
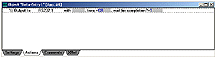
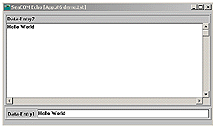
Now with some
resizing and cosmetic work your project turns out looking like this!
Please see the
SeaCOMEcho.tst example program for this example of piping a SeaCOM port to a Data-Entry
object. RS-485 cards with autoenable turned on also work well with TestPoint, although the
SeaCOMEcho.tst isn't as appropriate. |