
The next PC maintenance and repair topic we will cover is O/S installation, specifically Windows XP. Please realize that it is not the intent of this lab to make sure that everyone is intellectually challenged, rather it is to make sure everyone shares some basic capabilities, namely the ability to install an operating system. The laboratory instructions will take the student through the following steps.
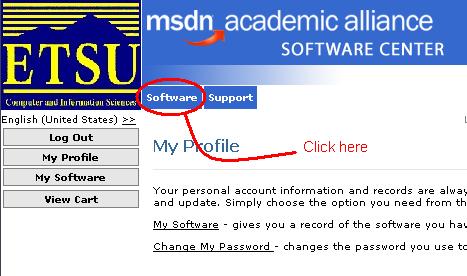
If you followed the correct procedures for getting the MSDN Academic Alliance password, you should have received an e-mail with a subject "Welcome to MSDN Academic Alliance: Online Software System" and a username and password contained within the body of the message. By following the instructions in the welcome message, you should be able to log into the download system using the username (most likely your e-mail address) and password they gave you. If you've already received a MSDNAA account and password for another course, then you will NOT receive the E-Mail containing duplicate account information. If you already have been entered as a user, you will need to use the password that you received for your previous access..
If the machine you are on has a CD R/W drive, then there should be software available on it to burn CDs. Double-clicking on the *.iso file that you downloaded should automatically start the CD burning software. If not, you may have to start the application from your desktop and select the option to record a CD from a CD image.
If you don't have access to a CD R/W drive, you may have to use one of the Gilbreath lab PCs. I believe the program on the laboratory PCs in Gilbreath is Roxio's Easy CD Creator.
To get started, we need to understand the boot up process of a computer. When you turn on a PC, there is a process that the processor goes through in order to run an operating system such as Microsoft WindowsTM. The general process has the following stages:
When a microprocessor first boots up, it has no clue. I'm serious. It's dumb as a rock. The first thing it needs to do is bring up its internal circuitry. This is what I'm calling the internal processor initialization. This involves simple things such as setting registers and the bits that control features to their default values. It is important to realize that at this point, the processor doesn't know how to communicate with anything except for a small amount of memory that contains non-volatile code. (Non-volatile means that it doesn't go away when the power goes away. RAM is not non-volatile.)
Once the processor has "come to", it needs to get some basic information such as how to access the hard drive, CDROM, or the floppy drive in order to load an operating system. This may seem trivial to you, but remember, when it first wakes up, the processor is dumb as a rock.
To do this, every PC contains a BIOS. BIOS stands for Basic Input/Output System, and it contains primitive software that shows the processor how to read from or write to devices such as the hard drive.
Once the BIOS has shown the processor how to access the hard drive or other media where the operating system is contained, the operating system can be loaded. The operating system contains the higher level software that allows the user to do things like:
Once the operating system is running, you need to load the "details". This would include things like software to allow access to "special" drives like a zip drive or a flash RAM. It might also include special drivers for high-performance video cards. In general, the drivers that were not needed for the PC to "come to" need to be loaded now so that the user can have access to them.
You can't run a computer without an operating system. So how does a computer with a blank hard drive start so that you can load an operating system? Well, it's going to have to find an operating system on one of the other drives, either a floppy drive, a CDROM, or a Zip drive.
In the past, the BIOS was only capable of seeing either the hard drive or the floppy drive. This was bad. It meant that for a new hard drive, the system had to be brought up using only the floppy drive. Since floppy drives only have a capacity of 1.44 megabytes, and even an old O/S such as Windows 95 took over a 100 megabytes, we had to load a stripped down version of the operating system. (For those of you who are familiar with DOS, the stripped down operating system is almost identical.) Once the stripped down version was loaded, we could then see the CDROM from which we would install the O/S to our hard drive.
Two problems resulted from this arrangement:
To solve this problem, newer PCs have BIOS's that are capable of seeing a CDROM. In our lab, the GX110's have this capability. This will allow us to install the O/S from a CDROM.
Using the process described in the BIOS lab, enter the computer's setup screen. Verify that the computer's boot sequence starts with the CDROM.
Upon reboot, the O/S on the CDROM may present you with the message:
Press any key to boot from CD-ROM
Do this, and the PC will load the operating system from the CDROM. Once the O/S is loaded, the program to install Windows XP will automatically be entered. The following is a terse step-by-step account of what you will be seeing.
At this point, you will be presented with a screen to manage the partitions on your hard drive. The screen should look similar to the text shown below. (The details of your screen may differ slightly.)
 Windows XP Professional Setup
================================

   The following list shows the existing partitions and
   unpartitioned space on this computer.

   Use the UP and DOWN ARROW keys to select an item in the list.

      o  To set up Windows XP on the selected item, press ENTER.

      o  To create a partition in the unpartitioned space, press C.

      o  To delete the selected partition, press D.

  +------------------------------------------------------------------------------+
  |4564 MB Disk 0 at Id 0 on bus 0 on atapi                                      |
  |                                                                              |
  |    C:  FAT32                                 1221 MB (    981 MB free)       |
  |        Unpartitioned space                   2343 MB                         |
  |                                                                              |
  |                                                                              |
  |                                                                              |
  |                                                                              |
  |                                                                              |
  |                                                                              |
  |                                                                              |
  |                                                                              |
  |                                                                              |
  |                                                                              |
  |                                                                              |
  |                                                                              |
  +------------------------------------------------------------------------------+

  ENTER=Install  D=Delete Partition  F3=Quit
During the Linux installation lab, we will go into more detail about the use and application of partitions. For now it is safe to simply tell you that a single physical hard drive may be split into multiple logical drives. Each of these logical drives has its own file system, and for all intents appears to be a separate hard drive. Since Windows and Linux have two completely different file systems, they must be on different logical drives. Therefore, we need to take only a portion of your hard drive and assign it to Windows XP so that the remaining portion of the drive can be assigned to Linux partitions.
The next portion of this installation deals with the file system used to store data on your drive. Every hard drive containing data must have a certain amount of data assigned to act as a roadmap to finding files. This roadmap is called a file system. Different O/S's have different file systems. The file system used with older Microsoft O/S's was called a "File Allocation Table" or FAT.
With the advent of Microsoft Windows NT came a new Windows file system, NTFS. This does the same thing as FAT, but with more features. It is vital to note that an O/S using the FAT file system cannot see an NTFS file system. That means that any partition using NTFS cannot be viewed if the machine has been booted using an FAT-based O/S. This usually doesn't cause any problems unless you have a system capable of booting one of multiple O/S's.
Now let's continue with our installation.
After the network installation, the installer will try to connect to the Internet and register with Microsoft. This is a problem as our machines do not have Internet access.
That's it! I hope it worked for you!
If you did not have a chance to finish the Windows XP installation lab, you need to take some time during lab hours this week to finish it up.
As for why we need to install an operating system from scratch, if you need to ask that question, you've never had a hard disk crash. And just like riding a motorcycle, it isn't a question of if you're going to have a crash, but when.
Developed by David Tarnoff for CSCI 2150 -- Computer Organization at ETSU