 Create Clock Domain Dialog Box - Toggle Rates Disabled
When you run SmartPower, it researches your existing clock domains and partitions your design automatically. You may wish to review the list of clock domains in the Domains tab to ensure that all the clocks of your design are included in the list. Add or remove clocks as necessary.
To add a new clock domain:
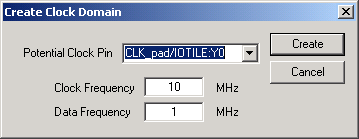
Click the Domains tab, and click the Add Domain button. Select Clock Domain from the drop-down menu. This opens the Create Clock Domain dialog box.
 Create Clock Domain Dialog Box - Toggle Rates Disabled
To create a new clock,
select a Potential Clock Pin,
specify a clock and data frequency, and click Create.
The new clock domain appears in the Domains
window. If you select an existing clock pin from the drop-down menu, the
lists of clock pins and data pins of this new clock domain are computed
automatically based on the netlist topology.
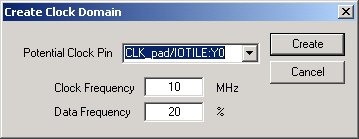
Note: Select Use Toggle Rates in the SmartPower
Preferences to define your data frequency as a percentage of your
clock frequency. If your data frequency is 20% of your clock frequency,
type "20" in the Data Frequency text box.
 Create Clock Domain Dialog Box - Toggle Rates Enabled
You may wish to create an empty clock domain and fill the lists of clock-pins
and data pins manually. If so, do not select a clock pin, just type a
new name for your clock domain.
Beyond the verification of the list of clock domains, you may also wish to verify that the lists of clock pins and data pins computed for each clock domain are correct.
To verify the lists of clock pins and data pins of a clock domain:
To select a Clock Domain, click the Domains tab, and select a specific Domain in the list.
Display the list of clock pins or data pins of this Domain. A drop-down menu in the Domain tab enables you to select clock pins or data pins. SmartPower displays the list of pins corresponding to your selection below the drop-down menu. You can add or remove clock pins and data pins as necessary.
Remove a pin from a clock domain. Highlight the selected pin and click the Remove button. The pin is removed from the clock domain, and is made available in the list of pins that you can add in another clock domain.
Highlight the selected
pin in the list of pins that are not yet in a domain and click the Add
button to add a pin in a clock domain. This
pin is added to the clock domain. It is a clock pin or a data pin, depending
on the specification of the drop-down menu when you click the Add
button.
Note: You cannot add a pin that exists in another domain until you free it from the existing domain. The pin is unavailable until you remove it from that domain.
After you have verified that all the clocks of your designs are correctly identified and constructed, you must specify the correct clock and data frequency for each clock domain.
To add a new set of pins:
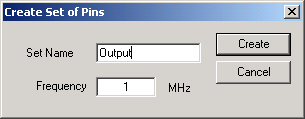
Open the Create Clock Domain dialog box. Click the Domains tab, and click the Add Domain button. Select Set of Pins from the drop-down menu.
 Create Set of Pins Dialog Box
Create a Set of Pins. Name your new Set of Pins, specify a data frequency, and click Create. The new Set of Pins appears in the Domains window.