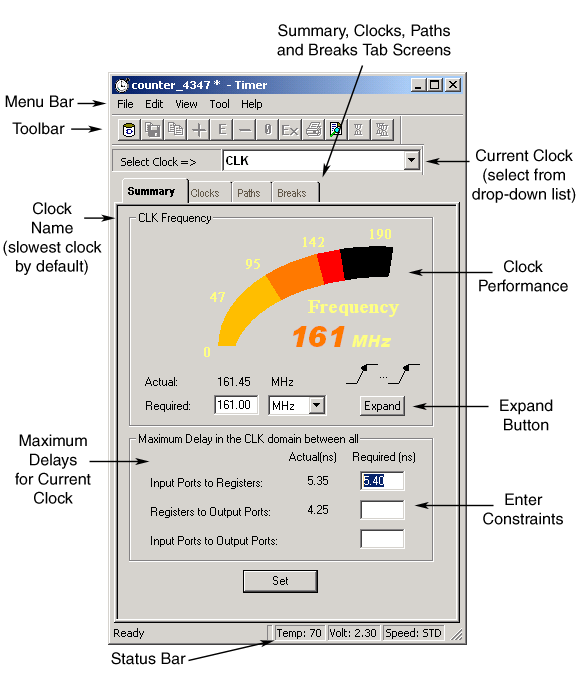
By default, Timer’s Summary tab screen displays the maximum frequency for the current clock selected in the Select Clock drop-down list box. You may need to specify false path or multi-cycle path constraints in order to obtain the correct frequency for your selected clock.
Timer Summary Tab Screen - PC Only
To change the default clock, select the clock from the clock list.
Click the Expand button in Timer Summary tab to display the details of the path that determined the maximum clock frequency in the Expanded Path window.
The icon above the Expand button shows the edges of the clock source triggering the two registers delimiting the critical path (the path responsible for the clock frequency). The icon represents four possible configurations: Rising-Rising, Rising-Falling, Falling-Rising, and Falling-Falling. The figure above shows the Rising-Rising configuration.
The Summary tab displays the actual longest/shortest delay between all Input Ports to Registers, Registers to Output Ports, and Input Ports to Output Ports.
Enter your new delay values in the Required input boxes and click Set to recalculate your delays.
Note: If you add constraints to the set of paths listed in this tab, Timer uses them as global constraints for that clock. When you apply constraints in the Summary tab, it is easy to over-constrain the design; this may degrade the quality of the Timing-Driven Layout and increase the overall run time.