Chapter 8. Submitting Your App to iTunes
| If you know HTML, CSS, and JavaScript, you already have what you need to develop your own iPhone apps. With this book, you'll learn how to use these open source web technologies to design and build apps for both the iPhone and iPod Touch. Buy the print book or ebook or purchase the iPhone App. |

Finally, the moment you’ve been waiting for: submitting your completed app to iTunes. There are several steps to the process, and you’ll want to have all your ducks in a row before you get started. At a minimum, you’ll need the following to complete the App Store submission process:
A plain-text description for the application (4,000 characters max).
A URL where people can learn more about your app.
A support URL and email address so people can contact you with issues pertaining to your app.
If your app requires a login, full access credentials for a demo account so reviewers can test your app.
A 512 × 512 pixel icon.
A 320 × 480 pixel screenshot of your app.
A distribution provisioning profile for the app.
A zipped version of the application binary.
Everything you need for submission is fairly straightforward except for the last two items: the distribution profile for the app, and the application binary. We’ll cover those in detail in the following sections.
Note
Wherever I refer to Kilo in this chapter, please substitute the name you are going to use for your app.
Creating an iPhone Distribution Provisioning Profile
In Chapter 7, Going Native, you created a development provisioning profile that allowed you to test your app on an actual iPhone. Now, you need to create a distribution provisioning profile in order to submit the app to iTunes.
Navigate to the iPhone developer site (http://developer.apple.com/iphone/) and log in.
Click iPhone Developer Program Portal in the right sidebar.
Click on Provisioning in the left sidebar.
Click on the Distribution tab.
Click the New Profile button.
Choose App Store as your distribution method.
Enter a profile name (e.g., Kilo Distribution Provisioning Profile).
If you have not created a distribution certificate, you should do so before proceeding. If you see a link on this page labeled “Please create a Distribution Certificate,” click it and carefully follow the instructions. You’ll be making a couple of trips into the Keychain Access application (located in
/Applications/Utilities) to create certificate signing requests and to install signed certificates that you download from the portal into your own keychain.Select the appropriate App ID (Figure 8.1, “Create a distribution provisioning profile in the iPhone developer portal”).
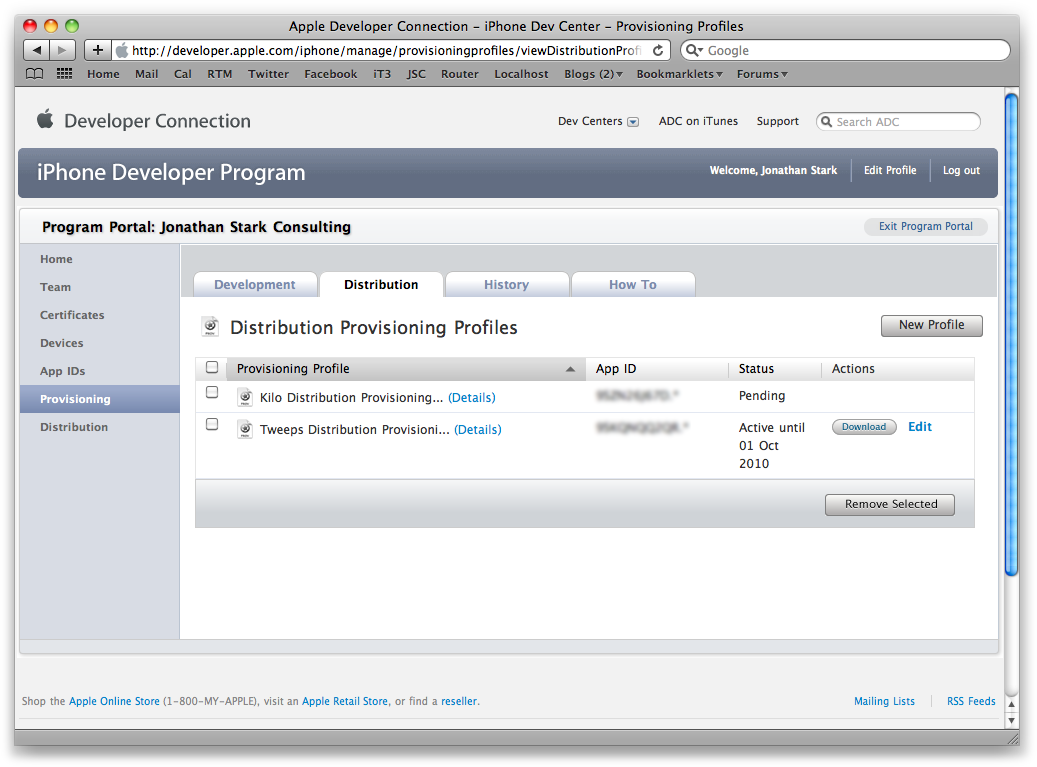
Click the Submit button (you’ll be returned to the Distribution Provisioning Profile list view).
Refresh the page until the Download button appears (Figure 8.2, “Refresh the distribution profile list until the Download button appears”).
Click the Download button to save the profile to your local download directory (usually the
Downloadsfolder in your Home folder).Drag the downloaded profile onto the Xcode icon in the dock.
Figure 8.1. Create a distribution provisioning profile in the iPhone developer portal
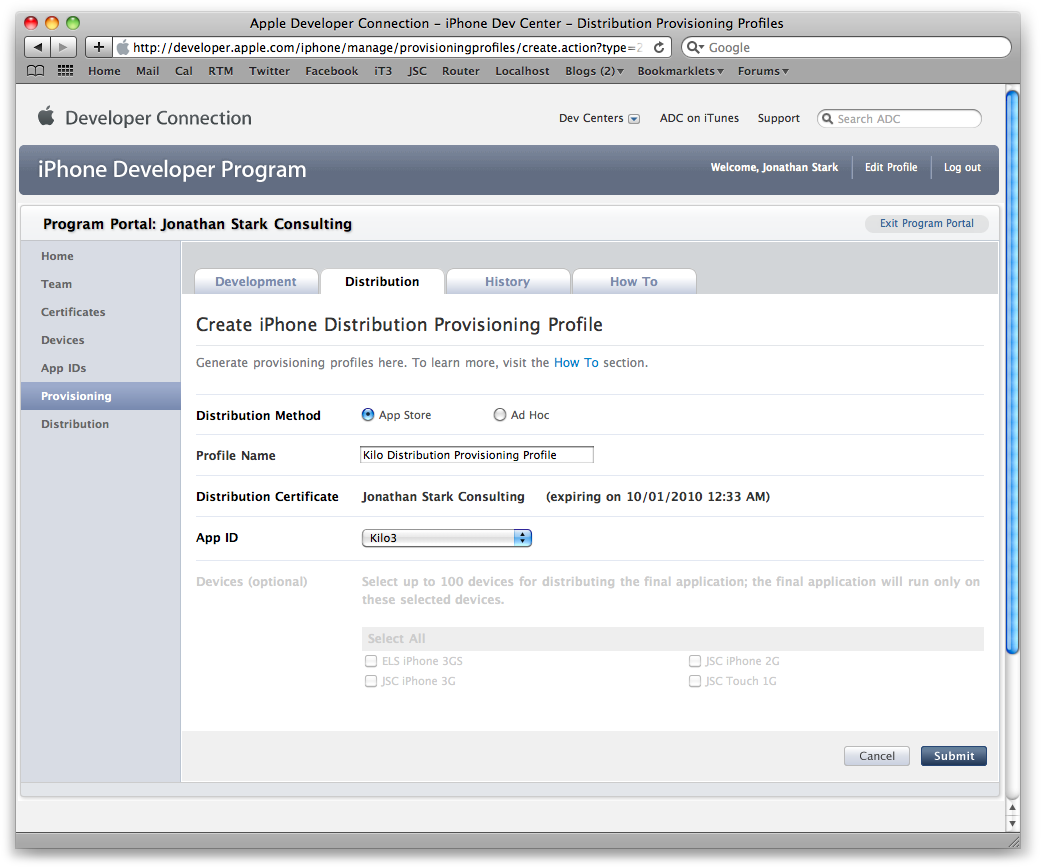
Figure 8.2. Refresh the distribution profile list until the Download button appears
Installing the iPhone Distribution Provisioning Profile
Now that the profile is in Xcode, you need to configure the project to use it.
Open Kilo in Xcode if it’s not already open.
Select Edit Project Settings from the Project menu (the project settings window will appear).
Click the Build tab if it’s not already active.
Select Distribution from the Configuration pop up.
Select “Settings Defined at This Level” from the Show pop up.
Locate Code Signing→Code Signing Identity→Any iPhone OS Device in the main area of the window.
Click the pop-up list to the right of Any iPhone OS Device to display a list of profile options (Figure 8.3, “Click the pop-up list next to Any iPhone OS Device”).
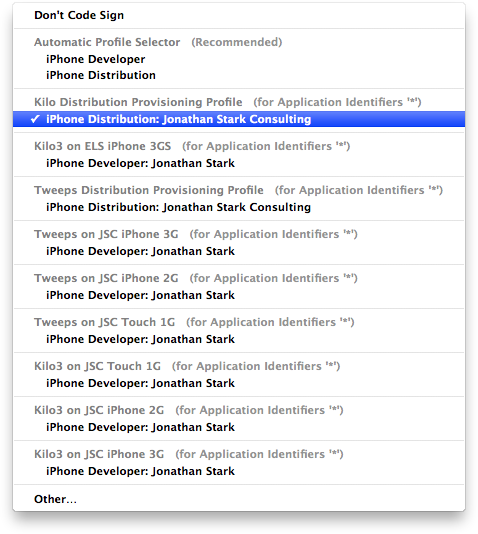
Locate your distribution provisioning profile in the list and select the distribution identity directly beneath it (Figure 8.4, “The distribution identity is located directly beneath the distribution profile”).
Close the Project Info window.
Figure 8.3. Click the pop-up list next to Any iPhone OS Device
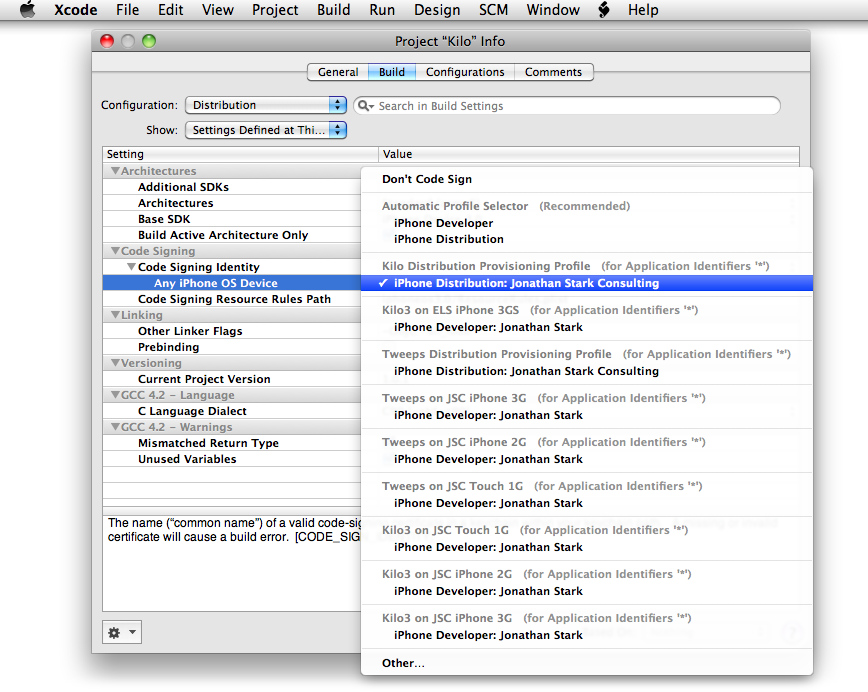
Figure 8.4. The distribution identity is located directly beneath the distribution profile
Renaming the Project
Before you submit your app, you need to rename it from PhoneGap to Kilo. To do so:
Open the project in Xcode.
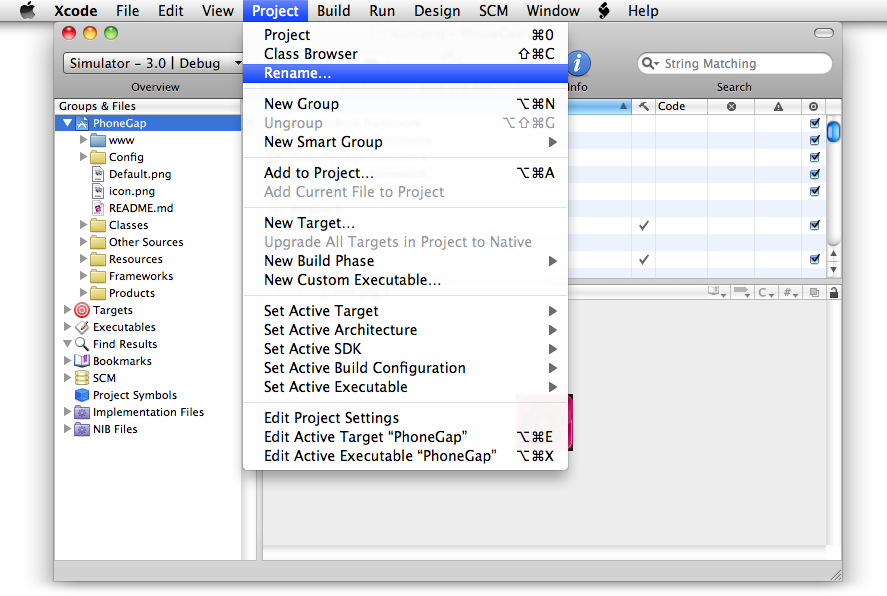
Select Rename from the Project menu (Figure 8.5, “Select Rename from the Project menu”).
Type Kilo in the “Rename project to” field (Figure 8.6, “Type Kilo in the “Rename project to” field”).
You can leave “Take Snapshot before renaming” checked if you want to save the state of the project prior to making the change, but it will significantly increase the amount of time it takes to process the request.
Click the Rename button.
Figure 8.5. Select Rename from the Project menu
You will see a series of green circles with white checkmarks in them that indicate that the changes have taken effect (Figure 8.7, “The green circles with white checkmarks in them indicate that the renaming process succeeded”).
Figure 8.6. Type Kilo in the “Rename project to” field
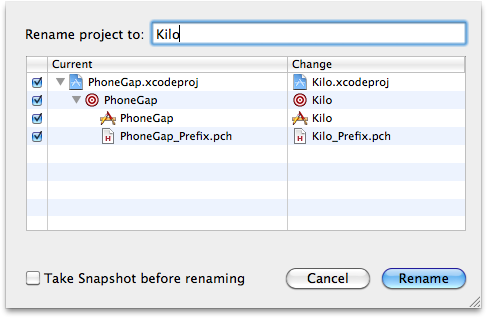
Figure 8.7. The green circles with white checkmarks in them indicate that the renaming process succeeded

Prepare the Application Binary
Next, we need to build the application executable and prepare it to be uploaded.
Select iPhone Device - 3.1.2 (or the current version of the iPhone OS) from the Active SDK pop up, then select it again and pick Distribution. This should set the target to something like “Device - 3.1.2 | Distribution.”
Select Clean All Targets from the Build menu.
Select Build from the Build menu. You may be prompted to allow the application
codesignto access your keychain. Allow it to do this so it can sign the app.Make sure that you didn’t get any errors.
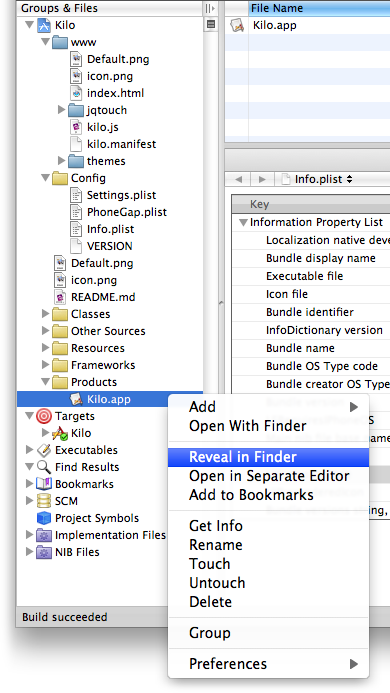
Reveal the app in the Finder (Figure 8.8, “Reveal the application in the Finder”).
Compress the app into a ZIP archive (Figure 8.9, “The application must be compressed as a ZIP archive to be uploaded”).
Figure 8.8. Reveal the application in the Finder
Submit Your App
Now that you have everything you need:
Log in to iTunes Connect (https://itunesconnect.apple.com/).
Click on Manage Your Applications.
Click on the Add New Application button.
Follow the onscreen instructions to proceed with the submission process.
Hurry up and wait.
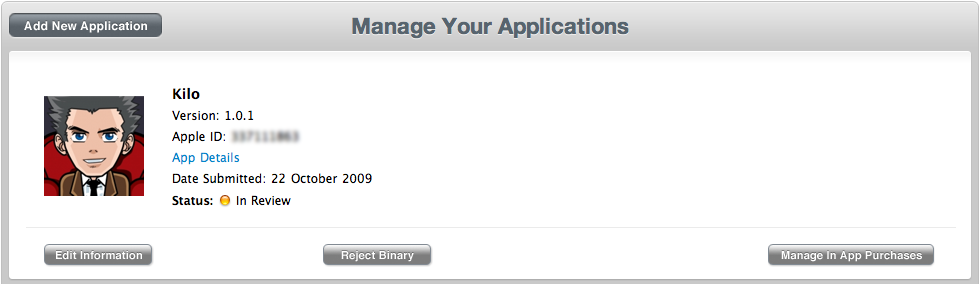
If all goes well, you should see your app listed as In Review (Figure 8.10, “The uploaded app will appear in your list with a status of In Review”).
Figure 8.9. The application must be compressed as a ZIP archive to be uploaded
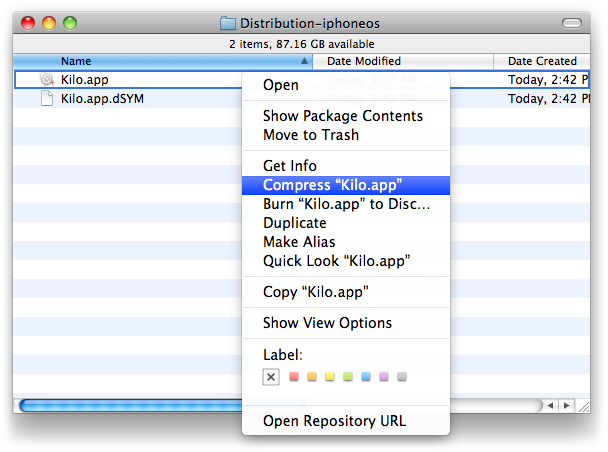
Figure 8.10. The uploaded app will appear in your list with a status of In Review
While You Wait
Congratulations! You’ve officially submitted your first app to the iTunes App Store! Now what? You’ll probably have to wait a week or two to hear back from Apple. Here are some things you can do in the meantime to keep yourself busy:
Set up a nice-looking web page for your app that is located at the URL that you submitted to Apple. Be sure to include the following elements:
A video of your app in action. Loren Brichter (http://twitter.com/atebits) has posted a great tutorial on making beautiful iPhone screencasts at http://blog.atebits.com/2009/03/not-your-average-iphone-screencast/.
A brief description of your app. Just a paragraph or two and 5–10 bullet points.
An iTunes link to purchase your app.
A few testimonials, with a link to more if you have them.
A support email address. You could opt to set up a support forum instead, but you’ll learn more about your customers via email.
Send personal email messages to bloggers who you think would be interested in your app. Target blogs that are relevant to the market for your app, and blogs that are about the iPhone in general.
Clean out your inbox. You’ll probably get about 5–20 email messages per 100 sales, so if your app is popular, you’re going to be getting a lot of email. Start with a clean slate!
Start working on your first upgrade. The more popular apps seem to upgrade about twice a month, which causes a steady buzz and lots of customer goodwill.
Further Reading
If you find yourself in a jam, here are some helpful resources:
jQTouch Issue Tracker: http://code.google.com/p/jqtouch/issues/list
jQTouch on Twitter: http://twitter.com/jqtouch
jQTouch Wiki: http://code.google.com/p/jqtouch/w/list
PhoneGap Google Group: http://groups.google.com/group/phonegap
PhoneGap on Twitter: http://twitter.com/phonegap
PhoneGap Wiki: http://phonegap.pbworks.com/
jQuery Documentation: http://docs.jquery.com/
W3C Spec for Offline Applications: http://dev.w3.org/html5/spec/Overview.html#offline