2.6. Launching the Application
Once your package is registered, you can use these startup options to access your package directly.
2.6.1. Windows launch
In the Mozilla install directory, launch xFly at the command prompt with:
mozilla -chrome chrome://xfly/content/
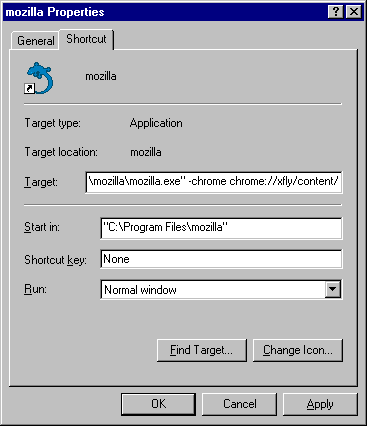
You can also launch xFly from a shortcut on your desktop by right-clicking on the existing Mozilla icon and selecting Properties. In the Target area of the Properties box, add the following text at the end of the line:
-chrome chrome://xfly/content/
Figure 2-6 shows what the new properties box should look like.
2.6.1.1. Unix launch
In the Mozilla install directory, launch xFly with:
./mozilla -chrome chrome://xfly/content/
2.6.1.2. Macintosh launch
Start xFly by creating a text file on your desktop with the following content:
-chrome chrome://xfly/content/
You can either drag this text file onto your Mozilla icon to launch the application or set the text file's creator type to MOZZ. If you change the creator type, you should be able to double-click on the text file to launch Mozilla.
Once you register your application, you are free to continue developing it in the various component subdirectories and relaunching it as it progresses. You can add new XUL files in the content directory, for example, that are invoked from buttons using window.openDialog( ) event handlers.
You can add new widgets to xfly.xul, add new styles to xfly.css that apply to the XUL, add new functions to xfly.js, or use existing functions in the Mozilla source code that you can find new ways to use in your own application.
 | If you have trouble editing and relaunching the xFly application, there are a couple of platform specific culprits to look into. On Windows, the Quick Launch feature may prevent you from seeing changes to your files. On Unix, file permission conflicts can also cause problems viewing your files. Making sure that Quick Launch is disabled and double checking file permissions may help get xFly working on your system. |
The steps described in this chapter -- creating a basic XUL file, adding features, displaying that XUL file as a standalone window, organizing the code into separate files and a package structure, and registering and launching that package -- are the basic building blocks of all Mozilla applications. When you get a feel for what's going on here, you'll be able to quickly understand and use the topics described in the rest of the book.