
Email Brian
Brian's Website


Email Tom
Tom's Website
|
Email Brian Brian's Website |
|
Email Tom Tom's Website |
Go to the Table Of Contents
Did you read the Preface? Thanks!
Note
For this chapter, we had an exceptionally ... enthusiastic ... copy editor. There were lots and lots of changes to our original material, from section titles to command description quotes taken verbatim from man pages being edited for style and grammar. Argh. We've done our best to spruce this one up, but if you run into something really incongruous, then please let us know.
Now we embark on a trek through some of the most common user, or command line, commands. There are over 1,800 such commands available under an OpenLinux system with all packages installed. This chapter addresses a small fraction of that number. Here, we will show you how to get started, be functional, and learn more on your own.
There are many tasks you can accomplish with your Linux-based computer, either as a regular user or as root (superuser). Improper use of commands can create new and innovative failure modes that may require reinstalling your system software. If this happens, don't be discouraged. Making mistakes is part of the learning process.
Hint
Work under a normal user account, rather than as root, whenever possible. This small step protects you from many of the pitfalls that the new user may encounter. Another useful trick lies in remembering that Linux is case sensitive. Less and LESS and less are three distinct strings, only one of which is a program (the latter).
This chapter presents commands by function rather than in an alphabetical listing. For example, files, directories, links, and permissions are gathered together as related concepts and objects. With a few exceptions, commands are listed in this chapter with an introductory paragraph or two setting the context for the program, followed by a more formal listing in the following form:
Name - Brief command description
Usage : name required [optional...] [argument...]
|
|
option | variant |
Description of option |
This scheme is typically followed with one or more examples of command use, sample output, and additional commentary for clarification.
Many commands (programs) have short (-l) and long style (--listing) options. Either form is acceptable, although we recommend learning the short form for interactive use, and the long style in scripts (for purposes of self-documentation). Options can be concatenated, so "-s -i -v" is also typed on a command line as "-siv." The Vertical Bar '|' (known also by its Unix name, pipe) character is used in the option listings as it is in manpages, as a stand-in for the word "or." Some programs have many pages of options documented; for these we only highlight the more common ones. Detailed online information for most commands is available through the man and info resources, both discussed in the following section.
Lastly, we understand that some of the explanations and descriptions contained in the pages that follow occasionally raise as many questions as they answer. The most common question is about regular expressions (or regex's) -- what they are and how to use them. Regex patterns search for and select text and are used extensively in many Linux commands. The "Using Filter Commands" section of this chapter discusses the basic details of regular expressions.
In the each of the various commands, we provide a working context that lets you understand the current topic; you can explore the other resources to learn more about related concepts at some later time.
HELP! AAAARRRRGGGHHHH! This is the sound of a new Linux user who has typed rm -rf / home/bilbrey/temp (don't try this at home), while logged in as root. After reinstalling your Linux system, the first thing to do is search out resources about that "event" (putting it politely), in order to prevent its recurrence. In this section, we survey the various resources available to convey help, information, and digital sustenance to the user.
Note
As used previously, the rm command erases the entire contents of the "/" (or root) file system. That accidental space between the first forward slash and home/bilbrey/temp is the culprit. Without the space, it merely deletes the /home/bilbrey/temp directory and all it's contents.
man commandThe man command - used to format and display online manual pages - is the single most useful command for the new and intermediate Linux user. Manpages (the program documentation files accessed by man) are the frontline help system in any Linux installation. Not only are manpages easily accessible, but the burden on system resources is low, with less than 15 MB of disk space required for all the manpages that are packaged with OpenLinux. Many (but not all) system commands have associated manual pages.
Sidebar :: The Case of the Missing Manpages
Follow these directions to add manpage capability and files to your system if they got left out at installation time. Insert the installation CD-ROM, and enter:
The su program (short for Super User), entered without argument, prompts a user for the root password. Upon authentication, root access is granted until exit is typed, or the virtual terminal is killed. The mount command tells the operating system that it can look for and find valid data on the CD-ROM, and the rpm command (Red Hat Package Management), typed as shown, installs the manpage program and data.
Note that the above loads ALL of the manual pages, in every available language. Select from the man-pages-*rpm files to load only the ones that you want, if desired.
man - Format and display the online manual pages
Usage : man [options] [n] name
|
|
-a |
Display consecutively all of the manpages that match name |
-C |
Specify a different configuration file than /etc/man.conf |
-p |
Use a different paging utility to display manpages |
-c |
Force a reformat of the manual page (used after updates) |
n |
Select a section from which to get manpage |
name |
Topic of manpage, must match exactly |
Example:
[bilbrey@bobo bilbrey] man man
Figure 17-1 shows the initial terminal window for the example given previously.
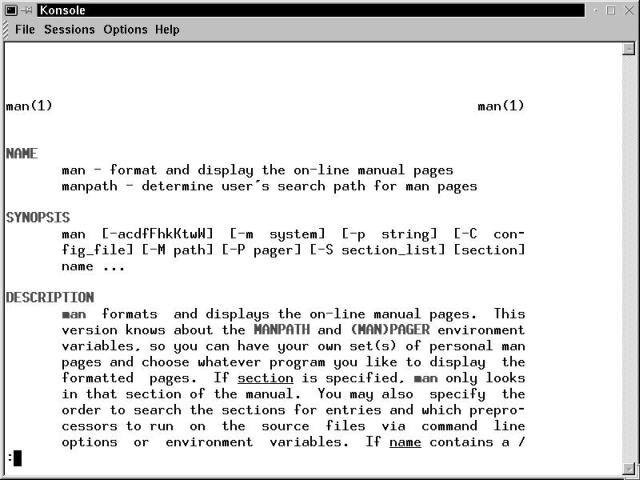
Figure 17-1
The man manual page displayed in a Konsole terminal window
Data from manual pages is collected and organized in a file called the whatis database. This database is generated after the installation of your Linux system, since installation options cannot be determined in advance with any accuracy. Tools such as apropos and whatis are used in conjunction with the whatis database to assist the user in locating the correct manual page.
Warning
The GNU/Linux operating system is a highly stable platform, designed and tuned for weeks and months of continuous uptime. Many tools of the system are partially dependent upon the system running fairly continuously. This includes the automatic process that builds the whatis database. If you get an error back typingman man, then look to themakewhatisprogram, described in Chapter 19, to build your manual page database.
Additionally, there are several different sections to the manpages, as listed here. Each section contains the manual pages pertinent to the section description given. Most user commands are documented in Section 1, whereas many of the programs discussed in Chapter 19 are tucked away in Section 8.
Section 1 Shell commands and executable programs
Section 2 Kernel functions (system calls)
Section 3 Programming routines that are not system calls
Section 4 System files and interfaces (usually /dev file info)
Section 5 Configuration file layouts and explanations
Section 6 Manpages for games, related information (joysticks, and so on)
Section 7 Conventions and formats for assorted macro packages
Section 8 System commands (usually for root user only)
Section 9 Documentation for experimental kernel routines
Manual pages for related functions or programs, from different sections, can have the same name (crontab exists in several sections, for example). Select the correct section to read from by specifying the section number just before the page name, as in:
man 5 crontab
There are two crontab pages, in Sections 1 and 5. Typing man crontab only displays the Section 1 manual page. To see multiple manpages, from all sections, type man -a pagename. The -a option displays the available pages sequentially - quit from one page to see the next. This option is useful when you are not sure if there are several pages on hand, nor which one might hold the data you are seeking.
The actual manual pages are stored in a compressed (gzip) format. For instance, the Section 5 crontab manual page used in the previous example is displayed from the following file: /usr/man/man5/crontab.5.gz. When a manual page is displayed, it is uncompressed, then processed for display to the terminal. The uncompressed file is stored in a temporary cache directory for possible future use.
info commandThe other major on-system resource for information is the Texinfo Documentation System, a text-based, hyperlinked help system. The info program is used to access this resource. The program displays information (and links between data) in a manner similar to the hypertext used in Web browsers. The most common question asked about info is, "Why a different hypertext system? Why not use HTML?" That is a good question, since the info interface is a little cryptic at first glance. The simple answer is that info was around long before HTML. The Texinfo interface is based upon the keymap employed by GNU emacs. Most of the info data is also available on the OpenLinux system via the browser interface that KDE provides. However, while working in console mode, you will be glad to know how to navigate info files in order to locate a crucial configuration file that prevents the X Windows server from starting. Starting info from the command line yields the display shown in Figure 17-2.
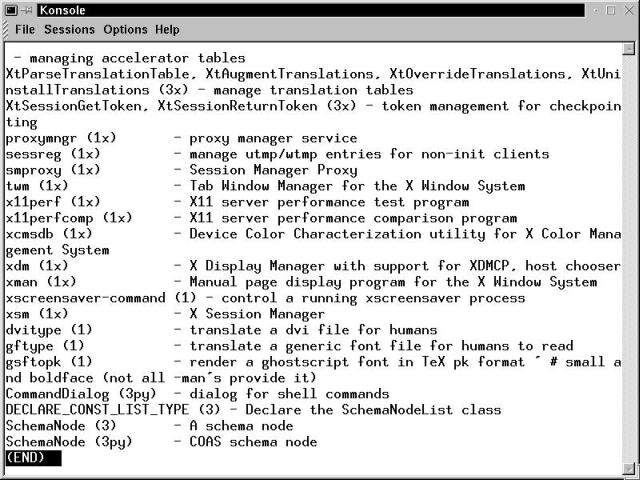
Figure 17-2
Terminal window with info splash screen visible
To really learn info, start the program and run the tutorial by pressing 'h'. Spend an hour or more finding new and interesting things. When that process is done, the interface has assimilated you. However, if you lack the time to explore, use the following commands inside info to get specific information and remember that typing a '?' displays a list of available commands.
The overall structure of info documentation is like that of an inverted tree. There are many root nodes at the top level - the page that is displayed when info starts. Descend the tree, drilling down into a subject by positioning the cursor on a link, shown as text lying between an asterisk and a colon (in bold, below):
* mkdir: (fileutils)mkdir invocation. Create directories.
Use the Arrow keys to position the cursor anywhere in the text mkdir and press Enter to go to the page requested. Often this leads to another menu of selections, depending on the complexity of the information. The search function permits quick isolation of the correct link or data on the current page. Another way navigation method is to skip from link to link using the TAB key.
Type forward slash (/) to start a search. While there are pattern-matching (regular expression) features in the search function, plain string matching works as well and usually directs the user correctly to the desired information. To survey information about directories, type /director, which will match on the words directory and directories. The first search finishes on the remsync line. Repeat the prior search by simply pressing / followed by Enter. On the third repeat, the cursor is placed on the mkdir line shown previously.
Page Up and Page Down permit vertical navigation on a page. Press u to move back up the tree (from the current document to the parent or calling document). Press q to leave info. If a help window (or other extraneous window) is open, type Ctrl+x 0 (the number zero) to close the window. From the command line, go directly to a page by using a correct keyword: info mkdir
info - Access the Texinfo help system files
Usage : info keyword
|
|
keyword |
Program names provide index key into info documentation |
Interestingly, when there is no Texinfo page on a topic (say, Perl), then typing info perl results in the perl manpage being displayed in an info-formatted screen. This scores points in info's favor, since it non-prejudicially displays the data from the "legacy" manual page help system. Note that the inverse does not hold true - there is no manpage for info.
apropos commandWhat are your options when the correct command isn't known? apropos often provides the answer. (Why only most of the time? Well, it depends on the words you choose to search for, for one thing...) The apropos program queries the whatis database, based upon the argument string or keyword provided, and displays a scrollable list of pertinent manpages. Note that specifying a string is not synonymous with specifying a word. To search for specific words in the whatis database look to the whatis command, coming up next.
apropos - Search the whatis database for strings
Usage : apropos keyword
|
|
keyword |
Can be any string (including spaces, if in quotes) |
Figure 17-3 shows the tail of the 344 lines returned by typing apropos man, demonstrating that some searches are a bit ... too broad. The less program (detailed in the section "Working with File, Directory, Permission, and Link Commands") formats the output, allowing the user to search and scroll through the listing. The commands to work with the output generated from the apropos command are few and simple. Page Up and Page Down function to scroll a multi-page apropos listing, pressing slash within a listing initiates a simple text search, and pressing q quits out of the listing.
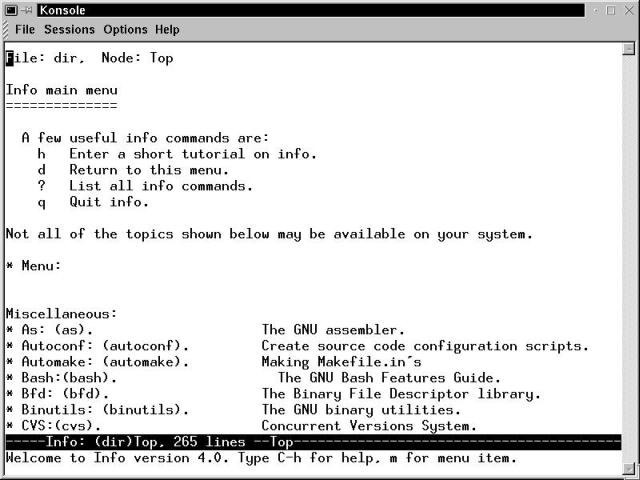
Figure 17-3
Part of the output from running apropos man.
The problem with the listing in Figure 17-3 is that there is too much information. Unusually for Linux, apropos is not case sensitive. So every entry from the whatis database that includes the string "man" is outputted. In cases like this, we turn to the whatis command for searching on whole words. With a little practice, apropos and it's companion command whatis are extraordinarily useful tools.
whatis commandWhen apropos returns too many results (say, more than two screens full), try narrowing the field by searching on whole words using the whatis command.
whatis - Search the command name field of the whatis database for whole words
Usage : whatis keyword
|
|
keyword |
keyword is the name of a command or program |
Examples:
[bilbrey@bobo bilbrey] whatis man
 . . .
man (1)         - format and display the on-line manual pages
man (7)         - macros to format man pages
man.conf (5)    - configuration data for man

[bilbrey@bobo bilbrey] whatis foolish
foolish: nothing appropriate
In the first example above, in a cleared screen, the three results shown are displayed. This is a more useful selection set than the 344 lines of output resulting from apropos man. whatis is most effective for determining which section's manpage to load when a program or function name is already known. When a keyword that is not a program, command, or in the description thereof is used, a result similar to the second command example shown previously is displayed.
locate commandWhen you need to find where a specific file is located - which can be a challenge in a large and complicated directory structure - the locate command can simplify the search.
Useful Information
When you need to locate the files for a newly installed program, package, or tar (tape archive) file, theupdatedbprogram needs to be executed to add the most recent inhabitants to the file name database. To do this,suto root, then executeupdatedb & ; exit. This runs the update in the background, continuing while you exit from superuser status. When the disk stops thrashing (usually several minutes), then the database has been refreshed. This results in a non-discriminating database that includes temporary files and everything else. The version that runs as an automated job every night can be executed by root as well: type/etc/cron.d/lib/update-locatedbto build a smaller database that omits several sub-directories. Examine that script file for details.
locate - List files that match a pattern in the locate database
Usage : locate [-d path | --database=path][--version][--help] pattern
|
|
--database |
Select a different file database than standard / |
--version |
Print locate version number and exit |
--help |
Show a list of valid options, short help and exit |
pattern |
String (or quoted string with metacharacters) to search for |
locate - List files that match a pattern in the locate database
Usage: locate [-d path | --database=path][--version][--help] pattern
--version Print locate version number and exit
--help Show a list of valid options, short help and exit
pattern String (or quoted string with metacharacters) to search for
Example:
[bilbrey@bobo bilbrey] locate XF86Config
/etc/XF86Config
/etc/XF86Config.org
/etc/XF86Config.vm
/opt/kde/shar/apps/lizard/templates/XF86Config
/opt/kde/shar/apps/lizard/templates/XF86Config.test
/opt/kde/shar/apps/lizard/templates/XF86Config.VGA16
/opt/kde/shar/apps/lizard/XF86Config
/usr/X11R6/lib/X11/XF86Config.eg
/usr/X11R6/man/man5/XF86Config.5x.gz
In that example, the current XF86Config file is located in /etc/, along with two backup copies created as system modifications were made. The versions that live in the lizard directory are OpenLinux specific, related to the Lizard installer. The X11R6 results show a generic (rather than distribution-specific) example file, and the XF86Config manpage (which is stored in .gz compressed format).
which command It is possible that there are multiple copies of a program in a Linux installation. While one version of a program is loaded by default when the system is installed, the administrator or a user can add another version or another program of the same name (but of a different revision or function). Which version is going to be executed? The aptly named which searches the current path, looking for the first file that matches the program name given. The output shows you the location of command that is executed when you type the program name.
which - Show the full path of commands
Usage : which program-name
|
|
program-name |
String (or quoted string with metacharacters) to search for |
Examples:
[bilbrey@bobo bilbrey] which man
/usr/bin/man

[bilbrey@bobo bilbrey] which kde
/opt/kde/bin/kde
whereis commandThe whereis program is another tool for locating resources on the system. Binaries (executable programs), sources (program code) and documentation (manpages) can all be located with just one whereis command. There is a range of useful options to modify and enhance whereis operation, as well. Lastly, the caveat at the bottom of the whereis manpage is pertinent:
"whereis has a hard-coded path, so may not always find what you're looking for."
The manpage states that whereis searches in a list of usual Linux places. Taken together, that means the search directories are written into the source code, rather than taken from a configuration file. Each Linux distribution can select a different set of "usual places" when compiling the utility. You can even download, modify, and compile the sources yourself to meet specific needs.
whereis - Locate the binary, source, and manual page files for a command
Usage : whereis [options [directories -f]] filename
|
|
-b |
Search for binaries only |
-m |
Search for manual pages only |
-s |
Search for source files only |
-u |
Search for unusual entries (missing one of the above) |
-B |
Change or limit the binary search directories |
-M |
Change or limit the manpage search directories |
-S |
Change or limit the source search directories |
-f |
Terminate list of -B, -M, -S options |
Examples:
[bilbrey@bobo bilbrey] whereis
whereis [-sbmu] [-SBM dir ... -f] name...

[bilbrey@bobo bilbrey] whereis printf
printf: /usr/bin/printf /usr/include/printf.h /usr/man/man1/
printf1.1.gz /usr/man/man3/printf.3.gz
While there is no explicit help option, typing whereis without options as shown in the first example displays a very short form of assistance. The second command example demonstrates that an executable binary called printf exists in the /usr/bin directory. In addition, the output shows the program's source file (printf.h), and two manpages (printf1.1.gz and printf.3.gz) associated with the printf name. whereis doesn't do a user much good if the command name isn't known to begin with, but is remarkably useful within its scope.
pwd commandThe pwd program is used to answer one of the more common questions encountered while using the command line: "Where am I?" Even seasoned users sometimes become disoriented in the complex structure of directories in a Linux installation. pwd returns the fully resolved path of the current directory in the calling terminal.
Note
pwd is one of those command that is both a GNU program (found at /bin/pwd), and a Bash built-in, as discussed in Chapter 14. Unless you fully specify the path to the GNU executable, you'll be running the Bash version. Fortunately, the results are the same, since we're describing the GNU edition, here.While that explanation may seem overly specific, recall that several terminal windows are often open simultaneously, and each can return a distinct path in response to the pwd command. A fully resolved path is a true path, rather than one that contains symbolic links (see the section "Links", later in this chapter).
pwd - Print name of current/working directory
Usage : pwd [options]
|
|
--version |
Print program version number and exit |
--help |
Show list of valid options, short help, and exit |
Examples:
[bilbrey@bobo bilbrey] pwd
/home/bilbrey
date commandThe date command functions in its simplest invocation to return the current system date and time. There are also a variety of options and formats for printing and setting the system date, depending on a variety of circumstances and requirements.
Unlike other operating systems, Linux is content to have a system (hardware) clock set to Universal Time (UT, formerly GMT). Local date and time information is calculated in interaction with the symbolic link, /etc/localtime, which is a pointer to one of the timezone data files located in /usr/share/zoneinfo. Setting time, date, and timezone is a tricky topic that we handily put off until Chapter 19.
date - Print or set the system date and time
Usage : date [options] ... [+format]
|
|
-d | --date=date |
Date may be given numerically or as a quoted string |
-f | --file=file |
Display like -date for each line in filename |
-r | --reference=file |
Display date and time file was last modified |
-R | --rfc-822 |
Display RFC-822 compliant date string |
-s | --set=string |
Set time as described by string |
-u | --utc |
Display (or set) Universal Time |
--help |
Show list of valid options, short help and exit |
--version |
Print date program version number and exit |
+format |
Display time using the given format |
Examples:
[bilbrey@bobo bilbrey] date
Sun Apr  9 16:38:31 PDT 2000

[bilbrey@bobo bilbrey] date -d '2 days ago'
Fri Apr  7 16:39:57 PDT 2000

[bilbrey@bobo bilbrey] date -d 'Jan 23' +%A
Sunday

[bilbrey@bobo bilbrey] date -d 'Dec 25'
Mon Dec 25 00:00:00 PST 2000
Note in the final example, that with a specified (rather than relative) date, the time information is unset. Two other things can be observed from the final sample. First, Christmas was on a Monday, in the year 2000. Secondly, the time-keeping facilities in Linux understand and track Daylight Savings Time quite well. The characters that define a format string (along with more examples) are listed by typing date --help.
logname commandThe logname command prints the login name of the current user. It's useful in some script applications, or from the command line if you've forgotten which username you're logged in under.
logname - Print the login name of the current user
Usage : logname [options]
|
|
--version |
Print locate version number and exit |
--help |
Show list of valid options, short help, and exit |
Example:
[bilbrey@bobo bilbrey] logname
bilbrey
users commandThe users command queries the /var/run/utmp file to return a listing of the usernames for existing login sessions. If a user is logged in more than once (say by having multiple consoles or terminals running), then that individual's username will appear that many times in the users output.
users - Print the login names of the current users on system
Usage : users [options]
|
|
--version |
Print program version number and exit |
--help |
Show list of valid options, short help, and exit |
Example:
[bilbrey@bobo bilbrey] users
bilbrey bilbrey bilbrey syroid bilbrey
who commandThe who command, executed with no non-option arguments, displays the login name, terminal device data, login time, and the hostname or X display (if applicable).
More Info
Most Linux commands try to interpret arguments that are not options as filenames, so a non-option argument is usually interpreted to be an error. The only non-option argument that is allowed specifies a filename pointer for the data (usually wtmp) to use in place of the utmp file. A two non-option argument directs who to output the information for the current user/device, preceded by the full hostname. This allows the common usage version of the program:who am i.
who - Show who is logged on
Usage : who [options] [filename] [am i]
|
|
--version |
Print program version number and exit |
--help |
Show list of valid options, short help and exit |
Examples:
[bilbrey@bobo bilbrey] who
syroid    tty3    Apr 16 15:35
bilbrey   :0      Apr 16 14:51 (console)
bilbrey   pts/0   Apr 16 14:51
bilbrey   pts/1   Apr 16 15:04

[bilbrey@bobo bilbrey] who am i
bobo.orbdesigns.com!bilbrey  pts/0    Apr 16 14:51
Warning
The on-system documentation for the who command, found by typinginfo who, is outdated on the 2.4 version of OpenLinux. The correct locations for the files mentioned in the "More Info" box above are /var/run/utmp and /var/log/wtmp. There are several gotchas like this in the file location schemes, as the Linux Standards Base guidelines are being followed in advance of the documentation. When other routes fail, use thelocatecommand to help determine actual file location.
w commandEven for a system like GNU/Linux, which is sometimes disparaged for having short, cryptic commands, w is a bit over the top. Typing w displays a superset of the information rendered by the who program.
w - Show who is logged on
Usage : w [options] [user]
|
|
-h |
Suppress printing of the listing header row |
-u |
Ignore user name while calculating JCPU and PCPU |
-s |
Short format: Skip login time, JCPU, and PCPU |
-f |
Toggle FROM field printing (suppress for OpenLinux) |
-V |
Show version information only |
user |
Display rows pertaining only to specified user |
The JCPU column lists total processor time for all currently running foreground and background processes. PCPU lists processor time for the current process (listed in the WHAT column) only.
Examples:
[bilbrey@bobo bilbrey] w
USER      TTY    FROM      LOGIN@   IDLE   JCPU  PCPU  WHAT
syroid    tty3   -         3:35pm   1:07m 0.31s 0.15s  top
bilbrey   pts/0  -         2:51pm   0:23m 1.02s 0.07s  man w
bilbrey   pts/1  -         5:39pm   0.00s 0.28s 0.08s  w
bilbrey   pts/2  grendel   5:23pm   0:17m 0.31s 0.15s  -bash
Several points of interest come out of the previous example. The third output line shows the process and login for the terminal that generates the output - you can see the w in the WHAT column. The fourth line reflects a remote login from another machine: grendel in the FROM column. As with previous examples, user syroid is logged in at a virtual console, via device tty3. All the other logins are virtual terminal sessions, denoted by the pts/n in the TTY column.
id commandThe id command is a tool for determining the user ID (UID) and group ID (GID) information about a user, as well as any supplementary groups that the user may belong to. Without arguments, id prints information about the current user.
id - Print real and effective UID and GID
Usage : id [options] [username]
|
|
-g | --group |
Display only the GID |
-G | --groups |
Display only supplementary groups |
-n |
Display name rather than number for -ugG options |
-r | --real |
Display user's real ID for -ugG options |
-u | --user |
Display only the UID |
--help |
Show short form help and exit |
--version |
Show version information and exit |
username |
|
Examples:
[bilbrey@bobo bilbrey]$ id uid=500(bilbrey) gid=100(users) groups=100(users) [bilbrey@bobo bilbrey]$ id syroid uid=501(syroid) gid=100(users)
echo commandThe echo command is commonly used in script files to display status or updates to standard output or standard error, as we shall see in Chapter 18. Additionally, echo is a handy diagnostic tool that permits easy examination of the shell variables affecting the current user. Again, we're describing the GNU utility, although the Bash built-in echo is actually what's executed by default, to the same effect.
echo - display a line of text
Usage : echo [options] string
|
|
-e |
Enable expansion of backslash quoted characters |
-n |
Suppress trailing newline character |
--help |
Show short form help and exit |
--version |
Show version information and exit |
string |
Text string to be sent to standard output |
Examples:
[bilbrey@bobo bilbrey]$ echo -n 'This is IT!!!'
This is IT!!![bilbrey@bobo bilbrey]$

[bilbrey@bobo bilbrey]$ echo $HISTFILE
/home/bilbrey/.bash_history

[bilbrey@bobo bilbrey]$ echo '$TERM'
$TERM

[bilbrey@bobo bilbrey]$ echo "My terminal setting is $TERM"
My terminal setting is xterm
In the first example, the -n option prevents a newline from being echoed to the display, which puts the next command prompt on the same line as the output from the echo command. The second example demonstrates using the echo program to examine the contents of a single shell variable. From Chapter 14, the leading $ on the variable tells the bash shell to expand the variable to its value, if it exists. In the last two examples, using the single (aka strong) quotes around a shell variable prevents the expansion; whereas the double quotes permits string echoing with variable expansion.
printenv commandThe printenv program displays environment variables. Additionally, the listing can be limited by specifying which variables to print. The documentation for printenv claims that when run without argument, printenv displays most environment variables.
More Info
set, a bash built-in command listed in Chapter 15, also displays environment variables, and lists Bash specific variables about whichprintenvknows nothing.
printenv - Print all or part of environment
Usage : printenv [options] [variable...]
|
|
--help |
Show short form help and exit |
--version |
Show version information and exit |
variable |
Text string to be sent to standard output |
Example:
[bilbrey@bobo bilbrey]$ printenv PATH
/bin:/usr/bin:/usr/local/bin/usr/X11R6/bin:/opt/bin:/opt/teTex/
bin:/opt/kde/bin:/usr/java/bin
Filesystems are composed of files. While that may seem a tad obvious, the filesystem is the foundation upon which an OS is based. Surely one doesn't need files to do lots of interesting things? True, but if you want a record of those interesting things, then the results are going to be written somewhere . . . in a file.
Physical disks are quickly rotating metal platters covered with a magnetic film. Binary information is written to the magnetic media. How that binary data is organized is the job of a filesystem. For most current GNU/Linux systems, that filesystem is e2fs (Extended 2 File System).
Under e2fs, every partition is formatted into groups, each of which contains key information that can be used to recover the vast majority of the disk's information should something drastic happen to the drive. Groups are divided into blocks, normally of 1,024 bytes in size.
e2fs is an inode-based filesystem. This means that every file on the disk is associated with exactly one inode. In the same manner that a URL such as calderasystems.com is translated by nameservers on the Internet into the IP address for the Caldera Systems Web server (207.179.18.130), the inode for the file /home/bilbrey/Chapter23 on this system, at this time, is 104928. Both names are equally valid, but text works better for us humans, and the numeric form works better for the computer. An inode stores pertinent file information such as filename, creation and modification times, file type, permissions and owner, and the location of the data on the disk. When a partition is formatted, the number of groups, blocks, and inodes are set. These cannot be changed without reformatting the partition.
Almost all of the commands that appear in this section work with files of one type or another (yes, directories are just special files). We start with ways to list files and get information about them.
ls commandThe ls command is one of the core commands for every linux user, and is used to list the files in a directory. The program also has a rather extensive list of options for selecting, sorting, and formatting the output data. There are many more options than the ones we find most useful - see man ls for more details.
ls - List directory contents
Usage : ls [options...] [filename...]
|
|
-a | --all |
Show entries starting with . ("hidden" files) |
-c |
Sort by change time (by creation time with -l) |
--color[=WHEN] |
Specify use of color in listings: never, always, or auto |
-d | --directory |
List directory entries rather than contents |
-h | --human-readable |
Format file sized in human terms 100K, 2.5MB, and so on. |
-i | --inode |
List the filesystem inode number associated with filename |
-l |
Display using long listing format (detailed) |
-r | --reverse |
Invert order of any sorted listing |
--sort=WORD |
Sort entries based upon extension, none, size, version, status, time, atime, access, or use |
-U |
Do not sort output, display in directory order |
--help |
Display help and exit |
--version |
Show version information and exit |
filename |
May be any filename, directory name, or wildcard pattern |
Examples:
[bilbrey@bobo bilbrey]$ ls
Chapter01   Chapter03   Chapter05   Chapter07   Chapter09   Chapter11
Chapter02   Chapter04   Chapter06   Chapter08   Chapter10   Chapter12

[bilbrey@bobo bilbrey]$ ls -al .bash*
-rw-r-r--  1 bilbrey  users     1408 Apr 17 21:09 .bash_history
-rw-r-r--  1 bilbrey  users       49 Nov 25  1997 .bash_logout
-rw-r-r--  1 bilbrey  users      577 Jul  8  1999 .bashrc

[bilbrey@bobo bilbrey]$ ls -il .bash_history
 104898 .bash_history
rm commandWhen you are done with a file, delete it. Easy, right? rm (for remove) will delete files for which the calling user has write permissions. Also, there are options to provide interactive feedback during rm processing (handy backstop for the new user).
rm - Remove files or directories
Usage : rm [options...] filename...
|
|
-f | --force |
Ignore non-existent filenames, never prompt |
-i | --interactive |
Prompt before each removal |
-r | --recursive |
Delete directory contents recursively |
-v | --verbose |
Display each action as done |
--help |
Display help and exit |
--version |
Show version information and exit |
filename |
May be any filename, directory name, or wildcard pattern |
WARNING
The last option given rules the day. If an option string ends inf, then the action will be forced, with a priori(interactive) option being overridden. We have been caught by this and so will you. One of the most dangerous commands the root user can run:rm -rf /, which deletes the entire file system. Don't do that unless you're planning on reinstalling, and all of your data is backed up, or you are clinically ... well, anyway, just don't do that, OK?
Examples:
[bilbrey@bobo bilbrey]$ rm -i Chapter?1
rm: remove 'Chapter01'? y
rm: remove 'Chapter11'? y

[bilbrey@bobo bilbrey]$ rm -rfv total
removing all entries of directory total
removing total/sum
removing total/dividend
removing the directory itself: total
The first example uses the ? wildcard to select all files that begin with "Chapter", have any character following that, prior to a closing "1". The -i option enables the per-file prompting seen in the example. The second example demonstrates recursion, forcing and verbose output.
You can exercise caution by creating an alias for rm - putting the following line in your .bash_profile: alias rm='rm -i'. Then, from every login session thereafter, the rm command will be run in interactive mode, which acts as a safety checkpoint, rather like training wheels until you get tired of them. Then you'll disable that one day, and remove a directory tree that you didn't intend... You are keeping and testing your backups, right?
cp commandTo copy files from one place to another, use the cp command. The function is reasonably similar to that of the copy command that exists under DOS, with one caveat: There must always be a specified destination, even if that destination is as simple as . (as in the period character), signifying "right here."
cp - copy files and directories
Usage : cp [options...] source [...] destination
|
|
--a | --archive |
Preserve permissions and structure as makes sense |
-b | --backup |
Make backup copies of files about to be overwritten |
-f | --force |
Forced overwrite at destination, no prompt |
-i | --interactive |
Prompt before overwrite, inverse of --force |
-p | --preserve |
Preserve permissions rigidly, including ownership |
-R | --recursive |
Use recursion to copy directory structures |
-u | --update |
Do not overwrite if destination is more recent |
-v | --verbose |
Display name of each file as copy executes |
--help |
Display help and exit |
--version |
Show version information and exit |
source |
May be any filename, directory name, or wildcard pattern |
destination |
Filename for single file source, directory otherwise. |
Example:
[bilbrey@bobo bilbrey]$ cp -bi Chapter* ~/book
cp: overwrite 'book/Chapter01'? y
cp: overwrite 'book/Chapter02'? y
   *   *   *
[bilbrey@bobo bilbrey]$ ls book/Chapter01*
book/Chapter01   book/Chapter01~
The example creates a backup copy of the original files (-b) and prompts prior to overwriting the original (via -i). The destination directory ~/book, in this case is the bash shell short hand for /home/bilbrey/book - the leading tilde, slash indicates something in the current user's home directory. On the other hand, the trailing tilde in the output of the ls command indicates that Chapter01~ is the backup copy created when the cp command was executed.
dd commandTo copy bits between devices and files, dd is a very handy utility. Most GNU/Linux distributions have associated utilities for creating boot, root, and rescue floppies. The utility allows a user (as root) to write floppy disks directly from disk image files. Additionally, dd can be used to create bit-wise copies of any information, useful when dealing with file types and file systems that are not native to Linux.
dd - Convert and copy a file
Usage : dd [option]...
|
|
bs=bytes |
Sets input (ibs) and output (obs) byte counts |
cbs=bytes |
Convert BYTES at a time |
conv=keywords |
Conversion from, to (keyword, keyword) list |
ibs=bytes |
Input block size in bytes |
if=filename |
Specify an input filename (instead of STDIN) |
obs=bytes |
Output block size in bytes |
of=filename |
Specify an output filename (instead of STDOUT) |
seek=blocks |
Block count to skip prior to writing output |
skip=blocks |
Block count to skip prior to reading input |
--help |
Display help and exit |
--version |
Show version information and exit |
The keywords are ascii, ebcdic, ibm, block, unblock, lcase, notrunc, ucase, swab, noerror, and sync (these are described in detail on the dd manual page). An example of the form given previously, creating a boot floppy, is demonstrated in the command line that follows (permissions apply - the root user would have to issue the following command to write to the floppy device directly):
[bilbrey@bobo bilbrey]$ dd if=/root/boot.img of=/dev/fd0 bs=512 sync
This command gets data 512 bytes at a time from the /root/boot.img file, and writes it to the "A" drive (drive 0 on the floppy chain). The sync option pads every write out to 512 bytes with nulls to ensure full sector writes. Usually this is only useful on the final sector write, to ensure that pre-existing data is overwritten properly.
mv commandThe mv program moves files and directories. Additionally, this is the command used to rename objects, as a specialized form of movement.
Numbered Backups
Add the following line to ~/.bash_profile:export VERSION_CONTROL=numbered. When this environment variable is set, numbered backups are created using themvandcpcommands with the-boption. While this feature has the ability to quickly fill drive partitions, you never lose data if you make backups with version control.
mv - Move (rename) files and directories
Usage : mv [options...] source [...] destination
|
|
-b | --backup |
Make backup copies of files about to be overwritten |
-f | --force |
Forced overwrite at destination, no prompt |
-i | --interactive |
Prompt before overwrite, inverse of --force |
-u | --update |
Do not overwrite if destination is more recent |
-v | --verbose |
Display name of each file as copy executes |
--help |
Display help and exit |
--version |
Show version information and exit |
source |
May be any filename, directory name, or wildcard pattern |
destination |
Filename for single file source, directory otherwise |
Example:
[bilbrey@bobo bilbrey]$ mv -bi Intro ~/book
mv: overwrite 'book/Intro'? y

[bilbrey@bobo bilbrey]$ ls ~/book/Intro*
book/Intro   book/Intro.~1~   book/Intro.~2~
As with the copy operation noted previously, ~/book represents a directory called book which is in the /home/bilbrey directory. Once the move operation is complete, with the backup (-b) and interactive prompt (-i) options enabled, the ls command displays the results of the move, showing the moved file and the two backup copies that exist.
The move operation has a number of distinct behaviors depending upon the specification of the source and destination. Overwriting is enabled by default in most GNU/Linux installations -- use the -b or -i options to protect against unanticipated data disappearance.
file --> filename Rename file to filename, overwrite if filename exists
file --> dirname Move file into directory, overwrite dirname/file if existing
dir --> dirname Move dir into dirname as a sub-directory, overwrite dirname/dir if it exists.
touch commandFrequently called upon by programmers and power users, touch updates a file's access and modification time to the current system time, by default creating the file if it doesn't exist. This is useful for a variety of reasons - for instance, there are other system tools such as make (a programmer's tool) that rely on file modification times to provide guidance on program operations. Another application family that uses timestamps are backups. touch a file to ensure it gets included in the current incremental backup, for example.
touch - Change file timestamps
Usage : touch [options...] file...
|
|
-a |
Change file access time only |
-c |
Do not create file if non-existent |
-d | --date=STRING |
Parse and use STRING instead of current time |
-m |
Change file modification time only |
--help |
Display help and exit |
--version |
Show version information and exit |
file |
May be any filename, directory name, or wildcard pattern |
Example:
[bilbrey@bobo bilbrey]$ ls Chapter3*
Chapter30.txt

[bilbrey@bobo bilbrey]$ touch Chapter31.txt

[bilbrey@bobo bilbrey]$ ls Chapter3*
Chapter30.txt  Chapter31.txt
The example shows a before and after listing. The touch command created the Chapter31.txt file. Another common use of the touch utility is to update the date/time stamp on a source code file, to ensure that its contents will be included when the code is compiled.
head commandThe head program displays the first part (or head) of a file or files. head is often used for a quick glance, to determine whether or not to edit the file. By default, the first ten lines of each file argument are listed, including a filename header when multiple file arguments are given.
head - Output the first part of files
Usage : head [options...] file...
|
|
-c | --bytes=N |
Print number of bytes equal to N |
-n | --lines=N |
Print number of lines equal to N |
-q | --quiet |
Suppress printing header information |
-v | --verbose |
Always print headers, even for single file arguments |
--help |
Display help and exit |
--version |
Show version information and exit |
file |
May be any filename or wildcard pattern |
Example:
[bilbrey@bobo bilbrey]$ head -vn4 Chapter17
==> Chapter17 <==
Now we embark on a trek through some most common user commands.
There are over 1800 commands available to the user of an OpenLinux
System with all packages installed.  This chapter addresses a small
fraction of that number. However, we will show you how to get started,
tail commandThis command is used to view part of one or more files; the bottom part. Like head, ten lines is the default chunk displayed. However, tail has an additional feature that head doesn't: the follow option. Follow directs tail to keep monitoring the file, displaying new lines as they are appended to the file. This behavior is especially useful when monitoring log files, a practice discussed in Chapter 21.
tail - Output the last part of files
Usage : tail [options...] file...
|
|
-c | --bytes=N |
Print number of bytes equal to N |
-f | --follow |
Output appended data as the file grows |
-n | --lines=N |
Print number of lines equal to N |
-q | --quiet |
Suppress printing header information |
-v | --verbose |
Always print headers, even for single file arguments |
--help |
Display help and exit |
--version |
Show version information and exit |
file |
May be any filename or wildcard pattern |
Example:
[bilbrey@bobo bilbrey]$ tail -vn4 Chapter14
==> Chapter14 <==
all the power of command line processing available. There
are advantages to working with multiple command line views,
as we shall see in Chapter 18. In this chapter, we examined
the fundamentals of consoles, terminals, shells and bash.
The more command
more is a simple paging filter. It displays the content of its arguments to the terminal or console, one page at a time. Additionally, there are a number of options to control the operation of more while it is displaying data. Finally, more automatically terminates when the end of the file is displayed (the last file, if more than one is specified on the command line).
Note
A filter is a program or tool that takes input, modifies it in some way, and sends the results to standard output (usually a console or terminal window). Filters may be used on a stand-alone basis, or string together via redirection to create complex data processing paths.
Figure 17-4 shows a terminal window displaying the results of the command more /etc/passwd. The status line at the bottom of the display shows the percentage of the file that has been viewed.
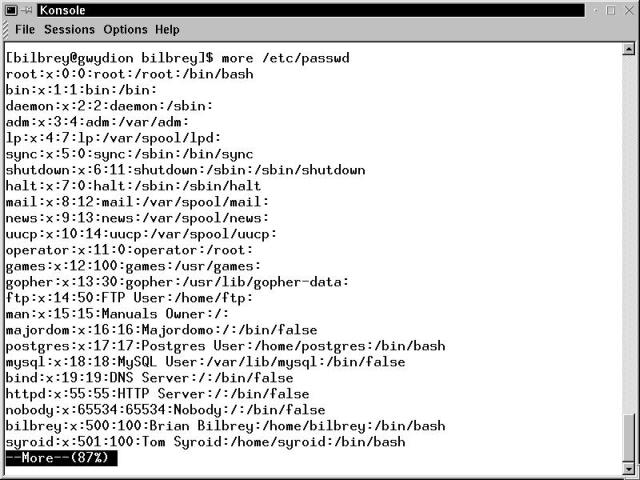
Figure 17-4
Terminal window with output from the more filter
more - File perusal filter for crt viewing
Usage : more [options...] [+/ pattern] [+linenum] file...
|
|
-N |
Specify the number of lines (screen size) |
-d |
Helpful mode: provide useful user prompts in operation |
-l |
Suppress special treatment of the form feed character |
-f |
Count logical, rather than screen lines |
-s |
Squeeze multiple blank lines into one |
-u |
Suppress underlining |
pattern |
Either a simple search string or regular expression |
linenum |
Integer target line number to display |
file |
May be any filename or wildcard pattern |
Table 17-1 lists the commands that are operative while the more filter is running.
Table 17-1
Interactive Commands for more
| Command | Description | |
h | ? |
Display command summary (these commands) | |
Space |
Display next K lines, default to screen size | |
K z |
Display next K lines, default to screen size, K becomes new default | |
K Enter |
Display next K lines, default to 1, K is new default | |
K d | K Ctrl + D |
Scroll K lines, default is 11 lines, K is new default | |
q | Q | Ctrl + C |
Exit (Quit) | |
K s |
Skip forward K lines of text | |
K f |
Skip forward K full screens of text | |
K b | K Ctrl + B |
Skip back K full screens of text | |
' |
Go back to place where previous search started | |
= |
Display current line number | |
/pattern |
Search for pattern (string or regex) | |
Kn |
Search for the Kth occurrence of pattern (default 1) | |
!command | :!command |
Execute command in a sub-shell (then return to more) | |
v |
Start the vi text editor, cursor on current line | |
Ctrl + L |
Redraw the terminal or console window | |
K:n |
Go to Kth next file (default to 1) | |
K:p |
Go to Kth previous file (default to 1) | |
:f |
Display current file name and line number | |
. |
Repeat previous command |
less filterless is described in the system documentation as the opposite of more. This is rather tongue-in-cheek, as less is generally regarded as an extremely capable paging tool, with an option and feature set that greatly exceeds that of the more filter. less is the default paging tool for OpenLinux. man and other programs use less, as it is specified by the PAGER shell variable.
The options and commands as described above for more, work for less. Additionally, the cursor keys (arrows, Page Up, Page Down) are useful for file navigation. One of the main advantages of less is its facility for moving and searching backwards (towards the top of the file). For full details on the less filter, view the manual page.
gzip utilitygzip is a file compression utility that uses Lempel-Ziv coding. The tar command (below) can dynamically call gzip during tar's operation - this is the most common use of gzip. gunzip, the complementary program, is simply a call to gzip with the -d option active. The third related program is zcat, which decompresses manpages in preparation for display. gzip uses CRC (Cyclical Redundancy Checks) to verify data integrity.
gzip - compress or expand files (also gunzip and zcat)
Usage : gzip [options...] filename ...
|
|
-d | --decompress |
Decompress file |
-f | --force |
Compress or decompress, even if overwriting will occur |
-l | --list |
List compressed, uncompressed sizes, ratios and filenames for an existing .gz file specified by filename |
-L | --license |
Display the gzip license and exit |
-r | -- recursive |
If a directory argument is given, compress directory contents recursively |
-t | --test |
Check compressed file integrity |
-v | --verbose |
Display name and percent reduction for each file |
-N | --fast | --best |
Specify N from 1 (--fast) to 9 (--best) in tradeoff of execution speed version compression efficiency |
-h | --help |
Display help and exit |
-v | --version |
Show version information and exit |
filename |
List contents of, compress to, or decompress from filename |
Example:
[bilbrey@bobo test]$ ls -l
total 39
-rw-r-r--   1 bilbrey  users   38646 Apr 19 20:02 gzip_test

[bilbrey@bobo test]$ gzip -v gzip_test
gzip_test:      63.4% -- replaced with gzip_test.gz

[bilbrey@bobo test]$ ls -l
total 15
-rw-r-r--   1 bilbrey  users   14161 Apr 19 20:02 gzip_test.gz
Called interactively, gzip compresses and expands in place. The preceding example shows the original file and related information with the first ls -l command. The gzip command that follows is invoked using the verbose option to display the compression ratio as well as confirm that the original uncompressed file has been deleted and replaced by the compressed file. The final ls -l command is to confirm the contents of the directory as well as the file size reduction. The file gzip_test was a simple ASCII file, and achieved average compression ratios. A large uncompressed binary file (say a TIFF format graphics file) can reach compression ratios over 95%.
bzip2 utilitybzip2 is a newer file compression utility which has recently become part of most distributions. Some publishers (like OpenLinux) ship bzip2; other vendors do not include it as part of the standard distribution, but make it available as a supplemental package. bzip2 uses a block sorting compression algorithm in concert with Huffman coding to make for an extremely efficient compression, generally much better than gzip. A damaged bzip2 file can sometimes be recovered with the bzip2recover utility. The command line options are very similar (but not identical) to those of gzip.
bzip2 - a block sorting file compressor (also bunzip2 and bzcat)
Usage : bzip2 [options...] filename ...
|
|
-d | --decompress |
Decompress file (bzip2 -d == bunzip2) |
-z | --compress |
Compress file (bunzip2 -z == bzip2) |
-c | --stdout |
Compress/decompress to stdout (like bzcat) |
-f | --force |
Compress or decompress, even if overwriting will occur |
-t | --test |
Check compressed file integrity |
-k | --keep |
Don't delete input files during compress/decompress |
-s | --small |
Reduced memory footprint for low RAM (< 8MB) |
-v | --verbose |
Display name and percent reduction for each file |
-N |
Specify N from 1 to 9 - 9 is the default and reflects the largest block size - use smaller numbers for low RAM |
-h | --help |
Display help and exit |
-v | --version |
Show version information and exit |
filename |
File(s) to compress |
Example:
[bilbrey@bobo test]$ ls -l
total 3071
-rw-r-r--   1 bilbrey  users  2983659 Apr 19 20:02 dick.tif
-rw-r-r--   1 bilbrey  users    51836 Apr 19 20:02 harry.tif.bz2
-rw-r-r--   1 bilbrey  users    92514 Apr 19 20:02 tom.tif.gz
The preceding example shows three files, all of which were identical at the beginning of testing. The top file, dick.tif is an uncompressed tiff file, nearly 3M in size. The bottom file, tom.tif.gz is gzip'ed, which yielded a compression ratio of 96.9 percent. By contrast, the file harry.tif.bz2, compressed by bzip2, reflects a compression ratio of 98.2 percent.
Where does this small change in compression ratios make a real difference? The Linux kernel, for one. A gzipped 2.4.4 kernel is 25.1 MB. The comparable bzipped file is just 20.4 MB. That's nearly 5 MB difference, quite a lot over a dialup line. This argument applies for lots of network-based large software package distribution scenarios.
tar utilitytar is the predominant utility for archiving files, both for backup and distribution purposes. tar packs many individual files into a single archive file, preserving file ownership, permissions, and directory structure. The name tar is a contraction of Tape ARchive, owing to the program's background in writing to backup tapes. tar is gzip-aware - you can dynamically compress and decompress archives as tar reads and writes by including the -z option. This creates the commonly seen name.tar.gz files seen anyplace Linux programs are archived.
Today, tar files are used to distribute programs across the Internet and to make compressed local and remote backup files (including full system images). Specific files, and/or whole directory sub-trees may be archived, depending upon whether paths or files are arguments to tar. The backup scheme we used to ensure that this book's data was safe, in multiple locations, involved using tar to make archives of all the text and images generated. We use tar every day.
tar - The GNU version of the tar archiving utility
Usage : tar options... tarfile pathname | filename ...
|
|
| One (and only one) of the following options must be specified: | |
-A | --concatenate |
Append tar files to an archive |
-c | --create |
Create a new tar archive |
-d | --diff |
Find differences between system and archive contents |
--delete |
Delete from archive (not used with tape devices) |
-r | --append |
Append files to an existing archive |
-t | --list |
List tar archive contents |
-u | --update |
Append files newer than those in archive |
-x | --extract |
Extract files from an archive |
| Additional tar options include: | |
-f | --file F |
Specify tar archive file or device (a usual option) |
--checkpoint |
Print directory names as they are traversed |
-g | --incremental |
Incremental backup (new GNU format) |
-h | --dereference |
Copy files that links point to, rather than links |
-k | --keep-old-files |
Suppress overwrite of existing files on extract |
-K | --tape-length N |
Change tapes after N*1024 bytes written |
-M | --multi-volume |
Work with multi-volume (usually tape) archive |
--totals |
Print total bytes written with --create |
-v | --verbose |
List each file as it is processed |
-z | --gzip |
Filter the archive through the gzip utility |
-P | --absolute-paths |
Absolute path - do not strip leading slash from paths |
--help |
Display help and exit |
--version |
Show version information and exit |
tarfile |
Path and filename for tar archive |
pathname | filename |
Files and directories to archive (or extract) |
Example:
[bilbrey@bobo bilbrey]$ tar -zcvf ols.tar.gz Intro Ch*
Intro
Chapter01
Chapter02
* * *
Chapter29
The preceding example creates (-c) a new archive, called ols.tar.gz. By convention tar archives have a .tar file extension, and gzip files have a .gz file extension. One may find that gzipped tar files also have the "combo" extension of .tgz. Since we also specify that the archive be filtered through gzip (-z), the archive has the form given. The -v (verbose) option is included to give visual feedback that the correct files have been specified.
When tar archives are restored, as with the command tar -zxf ols.tar.gz, the files are placed into the file system with the path information that they were archived with. So the ols.tar.gz will unpack into whichever directory it is placed into, without creating a directory structure. If the original tar command had been typed as:
tar -zcvf ols2.tar.gz /home/bilbrey/Intro /home/bilbrey/Ch*
Then the files would have been archived (with the leading slash stripped) in the form home/bilbrey/Intro, and so on. When the ols2 archive is unpacked, it creates a home/bilbrey/* directory structure in the current directory.
Tip
As an archive tool, tar has one major shortcoming: a lack of error-checking as it works. If you get a corrupted block in a tarball, everything from that block on is corrupted. cpio is much smarter in this respect. That said, tar is still much more commonly used, for some reason. See the cpio manual page for all the details.
md5sum commandThere is often a need to generate a securely unique checksum for a file or package. md5sum computes a MD5 "Message Digest" or "fingerprint" for each file specified. Checksums are used to validate information transferred across the Internet, and to confirm that file contents are the same as at the time that an original fingerprint was created.
More Information
The RFC (Request for Comment) that defines the MD5 algorithm, its functions, and usages, is found at http://www.cis.ohio-state.edu/htbin/rfc/rfc1321.html. RFC1321 is an informational document (rather than an Internet standard) that describes MD5 as a message-digest algorithm that accepts an input of arbitrary size and produces a 128-bit "fingerprint." The theoretical odds of two random inputs generating the same message-digest are approximately 3.4 x 1038. MD5 is only about eight years old and the copyright is held by RSA Data Security, Inc.
md5sum - compute and check MD5 message digests
Usage : md5sum [options...] filename ...
|
|
-b | --binary |
Read file in binary mode |
-c | --check |
Check MD5 sums against given list (usually a file) |
-t | --text |
Read file in text mode (default) |
--status |
Suppress all output, use exit status code (with verify) |
-w | --warn |
Warn about improper lines in checksum file (with verify) |
-h | --help |
Display help and exit |
-v | --version |
Show version information and exit |
filename |
File(s) to compute checksum |
Example:
[bilbrey@grendel Linux-ix86-glibc21]$ md5sum --check SUMS.md5sum BugReport: FAILED Install: OK * * extract.exe: OK [bilbrey@grendel Linux-ix86-glibc21]$ md5sum BugReport 5f3688f3c1b1ad25f4cc82d753a3f633 BugReport
When XFree86 4.0 was first released, in March of 2000, we fetched the binaries to begin running tests. The first task was to check that the files had downloaded properly by using md5sum to confirm that the files had the same fingerprint as the files listed in SUMS.md5sum. This is the preceding example. We explicitly "damaged" the BugReport file to generate the error in the first line of the output (by adding a blank line to the top of the file).
find commandThe info documentation about find says "... how to find files that meet criteria you specify and how to perform various actions on the files that you find." Fundamentally, find permits very explicit specification of the features of files to be found, from date and size ranges, to file magic numbers (file type identifiers) and locations. Once found, files can be opened for editing, added to archives, or any number of other functions that make sense to perform on files.
find - Search for files in a directory hierarchy
Usage : find [path...] expression
|
|
-daystart |
Measure times from start of today, rather than 24 hours ago |
-depth |
Process directory contents before directory |
-follow |
Dereference symbolic links (look at linked files) |
-maxdepth N |
Descend no more than N (>0)directory levels |
-mindepth N |
Start looking (apply expressions) N directory levels down |
-mount |
Compatibility option, same as -xdev |
-xdev |
Don't descend directories on other filesystems (mounted) |
-v | --version |
Show version information and exit |
path |
Specify where to search (omitted/default: current directory) |
The expression part of find's usage is feature-packed and is documented in great detail in the info documentation (type info find).
Example:
[bilbrey@bobo bilbrey]$ find . -maxdepth 1 -mtime -1
./.wmrc
./.xsession-errors
  * * *
./Chapter16
./newest
The preceding example finds all files in the current directory (.), only in the current directory (-maxdepth 1) which have been modified in the last 24 hours (-mtime -1). The output of the find command may be piped into the tar command, or into a text file to show your boss (or yourself) what you've worked on in the last day, for example, or to select a group of files for backup.
Hint
Find has an extraordinarily rich functionality. We strongly recommend reading through the info documentation to find the wide variety of examples and applications for this utility. Typeinfo findto get started.
Directories are simply special types of files, whose contents are lists of other files, along with pointers to the inodes (partition locations) that contain information about each file within the directory. There are special features of directories that prevent normal users from treating them as files. So, a directory may not be directly edited, and there are checks in place against easily deleting them, as all of the structure below is removed when a directory is erased. However, as we noted in the beginning of the Help and System Information Commands section, there's nothing that prevents you from using the rm -rf [filespec | directory] command or others similar to shoot yourself in the foot, quicker than quick. The following commands work explicitly with the directory file type.
mkdir commandDerived from "make directory", mkdir provides directory creation services.
mkdir - make directories
Usage : mkdir [options...] directory ...
|
|
-m |--mode=MODE |
Set mode (-umask, see Permissions) for new directory |
-p | --parents |
Create any intervening non-existent directories required |
--verbose |
Print message for each created directory |
-h | --help |
Display help and exit |
-v | --version |
Show version information and exit |
directory |
Name of directory(s) to create |
Examples:
[bilbrey@bobo bilbrey]$ mkdir --verbose one/two/three mkdir: cannot make directory 'one/two/three': No such file or directory [bilbrey@bobo bilbrey]$ mkdir --verbose --parents one/two/three created directory 'one' created directory 'one/two' mkdir: created directory 'one/two/three'
In the first example, mkdir fails, claiming no such file or directory. This is due to the requested directory creation requiring a pre-existing path called /home/bilbrey/one/two in which to create directory three. In the second example, by adding the --parents option, the intervening directories are created.
rmdir commandThe complement to the mkdir program, rmdir removes empty directories only. Non-empty directories are dealt with (carefully, carefully) using the rm -rf command (described earlier in this chapter).
rmdir - Remove empty directories
Usage : rmdir [options...] directory ...
|
|
-p | --parents |
Remove explicit parent directories that are emptied |
--verbose |
Print message for each directory removed |
-h | --help |
Display help and exit |
-v | --version |
Show version information and exit |
directory |
Name of directory(s) to remove |
Examples:
[bilbrey@bobo bilbrey]$ rmdir --verbose one/two/three
rmdir: removing directory, one/two/three

[bilbrey@bobo bilbrey]$ rmdir --verbose --parents one/two
rmdir: removing directory, one/two
rmdir: removing directory, one
As with the --parents option in mkdir, this option, demonstrated in the second example, permits rmdir to delete the parent for each deleted directory, as long as the parent is also empty after the child directory is removed.
The following message text indicates a problem with file or directory ownership or permission:
Permission Denied
What a user can do, which files may be read, written or executed, all of this and much more depends on the read, write and execute permission attributes set for each file and directory. Permissions and ownership are powerful, if sometimes perplexing, features built deeply into the multi-user environment of GNU/Linux. This complex system has many interlocking directories, programs, and systems. The resulting structure needs a basis for protecting information and data. Permission and ownership provide such a foundation.
Ownership is fairly straightforward. If you own something, you can do anything you want to it: delete a file, deny read access (even to yourself), anything. If you don't own something, then the owner controls all access, period. Root and various other system-defined users own most of the contents of the filesystem. This is as it should be. System security, including the security of Internet connectivity with Linux, depends upon correct ownership and permissions.
Additionally, a file or directory may be associated with a group (such as users). Groups are an extension of the filesystem attributes, to permit users to be aggregated (grouped) and permissions granted to groups, rather than having to grant (or deny) individual access. Group and user management, as well as the chown utility (to change file ownership - a root user function), are addressed in Chapter 19.
Permission, on the other hand, is just a little tricky. It has different effects, depending upon the target: files or directories. There are three types of permission: read, write, and execute. These permission types can be applied to the owner, group, or other. Other is the collection of users not equal to owner or group.
[bilbrey@bobo bilbrey]$ ls -l newfile
-rw-r--r--  1 bilbrey  users       0 Apr 22 16:18 newfile
Using the ls command on a newfile created for the purpose, the attributes of a (nearly) normal file are revealed. The permissions string, which we address momentarily, leads off. The '1' indicates that there is only one hard link to this file's inode (see Links, below). Then the file owner, bilbrey, and the default group for the file, users, is given. File size, modification date and time, and lastly file name, round out the majority of the information.
    -   r   w   -   r   -   -   r   -   -
 type | owner     | group     | other     |
Taken as a whole - the permissions string is referred to as a file's mode. The leading character of the permission string shows the file type: - indicates a normal file, d is a directory, l is a symbolic link, c and b are reserved for character and block devices, respectively. As the owner of the file, bilbrey created newfile and automatically got both read and write permission. By default, all other individuals, either in the group users, or others, have read-only access to the file. For normal files, read permission grants the boon of examining a file's contents. Write permission allows both changing and deleting files. Execute permission permits the file to be run as a program or script. The identity and group affiliations of an individual attempting to access newfile determine whether she or he is successful or not.
On the other hand, when the permissions are applied to a directory, there are some interesting effects. Write permission is clear - access to write and delete files in the directory is granted. Read permits listing the contents of the directory. Execute permission, in this context, allows access to the contents of the directory. Thus, a directory that has execute but no read permission has files that can be accessed if the exact name is known. The files in the directory may not be listed to determine a name.
[bilbrey@bobo bilbrey]$ mkdir sample17

[bilbrey@bobo bilbrey]$ ls -l sample17
drwxr-xr-x  2 bilbrey  users       1024 Apr 24 00:05 sample17
Note the default permissions for creating a directory give full access to the creating user, and full read access to group and world (others).
chmod commandThe owner of a file has the ability to change a file's mode by using chmod. There are two ways of addressing the mode string for a file, either symbolically, as discussed previously, or directly by specifying the octal number, which represents permissions as a bit string. At the risk of being repetitive, let's start with symbolic mode. For this command, we'll look at examples and explanations first, to give the program a conceptual framework.
There are three types of permission: r, w and x, for read, write, and execute. There are three types of access: u, g, and o, symbolizing user, group, and other (world). The access types may be grouped with an a, standing for all. So, to change the file Script01 so that all users on the system can access it for read and write:
[bilbrey@bobo bilbrey]$ chmod a+rw Script01

[bilbrey@bobo bilbrey]$ ls -l Script01
-rw-rw-rw-  1 bilbrey  users       1024 Apr 24 00:18 Script01
Then to add execute permission for members of the same group, run the following command:
[bilbrey@bobo bilbrey]$ chmod g+x Script01
Alternatively, chmod uses octal numbers (base 8, numbers 0 through 7) to set permissions. The advantage of using the numeric mode is that fine-grained permission control is available using a very brief command. Numeric mode is absolute. All of a file's permissions are set in one command.
[bilbrey@bobo bilbrey]$ chmod 755 Script01

[bilbrey@bobo bilbrey]$ ls -l Script01
-rwxr-xr-x  1 bilbrey  users       1024 Apr 24 00:18 Script01
In the same manner that the decimal system uses 10 numbers, 0..9, octal representations use the numbers 0..7. In binary notation (as used by the computer), octal numbers can be represented with 3 bits.
Table 17-2
Numeric (Octal) Permissions
| Octal | Binary | Permission>|
0 |
000 | >
None |
1 |
001 | >
x |
2 |
010 | >
w |
3 |
011 | >
wx |
4 |
100 | >
r |
5 |
101 | >
rx |
6 |
110 | >
rw |
7 |
111 | >
rwx |
Octal one (001), two (010), and four (100) represent distinct bit patterns, representing execute, write, and read permission, respectively. Bear in mind that the order of access listed is user, group, and then other. So to assign user permission of read, write, and execute, and read-only access for group and other, the octal mode is 744. if you take out the 001 (binary) that represents user execute permission, use 644 for user read/write.
For files that you want to keep secret from everyone but yourself and the root user, use a permission of 600, which gives no one else any access at all.
chmod - Change file access permissions
Usage : chmod [option...] mode[,mode]... filename...
|
|
-c | --changes |
Semi-verbose - print changes only |
-f | --silent | --quiet |
Suppress most error messages |
--reference=rfile |
Make permissions like rfile's |
-R | --recursive |
Change files in specified directories recursively |
-v |--verbose |
Print message for each file or directory |
-h | --help |
Display help and exit |
-v | --version |
Show version information and exit |
filename |
File(s) for permissions modification |
Symbolic modes may be concatenated, leading to commands like the following (which illustrates why numeric mode is useful - the second line has identical consequences):
[bilbrey@bobo bilbrey]$ chmod u+rw,u-x,go+rx,go-w Chapter16.txt

[bilbrey@bobo bilbrey]$ chmod 655 Chapter16.txt
Another program that can be used for file permission modifications is chattr. chattr is specific to Linux ext2 filesystems. Learn more by typing man chattr.
chgrp commandThe chgrp program is a utility to change the group associated with a file or directory. This is often done to make specific files or subdirectories available to other users for project or departmental purposes. The root user administers groups.
After a group is created, a user needs to log out completely, then login again in order to be recognized in the new group.
chgrp - Change file group ownership
Usage : chmod [option...] group filename...
|
|
-c | --changes |
Semi-verbose - print changes only |
-f | --silent | --quiet |
Suppress most error messages |
--reference=rfile |
Make group like rfile's |
-R | --recursive |
Change files in specified directories recursively |
-v |--verbose |
Print message for file specified |
-h | --help |
Display help and exit |
-v | --version |
Show version information and exit |
filename |
File(s) to modify group affiliation |
Example:
[bilbrey@bobo bilbrey]$ ls -l Faren.451
-rw-rw----  1 bilbrey  users      53475 Apr 25 18:24 Faren.451

[bilbrey@bobo bilbrey]$ chgrp -c ProjectX Faren.451
group of faren.451 changed to ProjectX

[bilbrey@bobo bilbrey]$ ls -l Faren.451
-rw-rw----  1 bilbrey  ProjectX   53475 Apr 25 18:24 Faren.451
Hint
chgrpandchmoddo not affect the modification time associated with a file.
umask commandFiles are created in a variety of ways. When you create and save source code in an editor like vi, when you compile that code to create a running program, when you touch a non-existent file - all these methods and many more create files. When a file is initialized, there are permissions set from the beginning. For most files, this involves read and write - compiler output adds executable permission to the files it creates.
[bilbrey@bobo bilbrey]$ touch script02

[bilbrey@bobo bilbrey]$ ls -l script*
-rw-r--r--  1 bilbrey  users         71 Apr 25 18:24 test.c
In the example, script02 is created (using touch) with rw permission for the owning user, and read access for the owning group and all others. The default file creation permissions mask is preset. umask is the tool to modify that default. umask is a built-in command - a part of the bash shell (discussed in Chapter 15). umask lists or sets the bit mask (specifying which permissions are turned off) for file creation. The default umask is 022 octal, meaning to disallow write permission for group and other, but allow reading by all.
umask - Display or change the file creation mask
Usage : umask [option] [nnn]
|
|
-S |
Display mask in symbolic (rwx) mode |
nnn |
Octal code specifying permissions to mask (if not symbolic) |
Following the preceding example, which showed a file created with default permissions 022, we can modify the default permissions mask to allow read and write access for group as well as user, leaving other (world) access set to read only:
[bilbrey@bobo bilbrey]$ umask 002

[bilbrey@bobo bilbrey]$ touch script03

[bilbrey@bobo bilbrey]$ ls -l script*
-rw-r--r--  1 bilbrey  users         71 Apr 25 18:24 script02
-rw-rw-r--  1 bilbrey  users         71 Apr 25 18:27 script03
Links are conceptually similar to the "shortcuts" used in other operating systems. There are two types of link, hard and symbolic.
Hard links were first-born, and have some distinctive features and limitations. To clarify our discussion of hard links, let's re-visit filename entries and structures for a moment. A filename is an entry in a directory. The filename is a human readable pointer to a physical spot on a filesystem, called an inode. When hard links are created, there are additional filenames pointing to the same inode (and thus, to the same data). In reality, when a hard link to a file exists, the shortcut analogy falls flat, since each filename is equally valid as a pointer to the file's data. When multiple hard links to a file exist, all of them must be deleted in order to delete the file's data. The number of hard links existing for a file is listed in the output of the ls command using the -l option. The link count is printed between the permission string and the user ID (uid):
[bilbrey@bobo bilbrey]$ ln test.c test.copy

[bilbrey@bobo bilbrey]$ ls -li test.c*
243004 -rw-r--r--  2 bilbrey  users    71 Apr 25 20:35 test.c
243004 -rw-r--r--  2 bilbrey  users    71 Apr 25 20:35 test.copy
After creating the link, two "files" exist, test.c and test.copy, both of which point to the same data, as verified by looking at the inode in the listing. Additionally, between the permission string and the user name is the hard link count (2 for each).
Hint
We discuss hard links because the default usage of thelncommand creates hard links. Symbolic links, which are created using theln -ssyntax are strongly recommended for all purposes.
The drawbacks to hard links include the fact that they cannot cross filesystem boundaries. For example, if the /home directory is located on the partition (device) /dev/hda5 and the /usr/local directory is located on /dev/hda7, then the following is not a legal command and generates the error message shown:
[bilbrey@bobo bilbrey]$ ln /usr/local/test.c /home/bilbrey/test.copy
ln: cannot create hard link 'test.copy' to /usr/local/test.c
invalid cross-device link.
Warning
Additionally, hard links cannot be made to point to directories by normal users. The system administrator who likes pain and really enjoys repairing damaged file systems has full ability to hard-link a directory. Usually directories have only two links, the filename from the directory above, and the . link contained in the directory itself.
To beat the limitations and problems that hard links can engender, symbolic links (or soft links or symlinks) were created. Symlinks are much more like shortcuts. A symlink points to another filename, rather than an inode containing file data. Many utilities (like tar) have options to force them to follow symbolic links. Also, when listed in long form, symlinks show the object they point to, as in the following example.
[bilbrey@bobo bilbrey]$ ln -s test.c test.c2

[bilbrey@bobo bilbrey]$ ls -li test.c*
243004 -rw-r--r--  2 bilbrey users  71 Apr 25 20:35 test.c
243004 -rw-r--r--  2 bilbrey users  71 Apr 25 20:35 test.copy
243009 lrwxrwxrwx  1 bilbrey users  71 Apr 25 20:47 test.c2 -> test.c
Observe that the permissions of the link test.c2 are full on (rwx for everyone). In this manner, the link permissions do not mask ("hide") the permissions of the underlying linked file or directory.
ln commandln - Make links between files
Usage : ln [option] target [linkname] [target... directory]
|
|
-b | --backup |
Make a backup of existing destination files/links |
-f | --force |
Remove existing destination file(s), no prompt |
-n | --no-dereference |
Treat symlinks as normal files (used as target directory) |
-i | --interactive |
Prompt before destination file removal |
-S | --suffix=SUFF |
Specify a backup suffix |
-v |--verbose |
Print message for file specified |
-h | --help |
Display help and exit |
-v | --version |
Show version information and exit |
target |
File(s) which link will point to |
linkname |
Name of link |
directory |
Specified with multiple targets, links created in directory |
More Filesystem Resources
System Resources
Within KDE, on the taskbar, K --> Documentation leads to a variety of html-formatted documents that contain much useful information. Also, make use of the manual and info pages for the programs and utilities that manipulate files, directories, and such. Explore and learn is the best advice we can give.Online Resources
A short introduction to e2fs (the filesystem running on your Linux box right now) is found at http://www.linuxdoc.org/LDP/LG/issue21/ext2.html. For more information about file systems than you ever, ever wanted to know, see http://www.linuxdoc.org/HOWTO/Filesystems-HOWTO.html.
When OpenLinux starts, the boot loader (usually Grub, by default) launches the Linux kernel. Every other job and task running on the system is a process, monitored and serviced by the kernel. Processes, such as a shell running in a terminal, spawn (or create) other processes; this is called forking. The following commands are used to monitor, schedule, control, and kill processes at the user level (though they also function fine for the superuser).
ps commandThe ps program displays a listing of "active" processes on the Linux system. We use active advisedly, since there are a variety of states, from sleep to running to zombie, that a process may be in. ps is commonly used to determine what the PID (Process ID) of a running job is. The PID is useful information specify when stopping a job or daemon. There are many options and formatting controls that can adorn a ps call - type man ps for more information.
ps - Report process status
Usage : ps [option...]
|
|
a |
Display list of all running processes |
x |
Display processes without associated terminals |
u |
Display user and start time for listed processes |
e |
Include process environment information |
f |
Show processes ordered by parent/child relationships (aka the forest/tree view) |
w |
Use wide format, lines are wrapped rather than truncated |
l |
Display a long listing |
--help |
Display help and exit |
--version |
Show version information and exit |
The output of the ps command can be piped to other utilities to narrow the field of view, as shown in the following example:
[bilbrey@bobo bilbrey]$ ps ax | grep netscape -
 9946 ?      S   0:05 /opt/netscape/communicator/netscape
10252 pts/1  S   0:00 grep netscape -
From the resulting output, we learn that there are two running processes that mention the word netscape, first is an actual running Netscape browser process, and second is the grep line which is used to isolate the netscape job from a 76-line process listing. The ? indicates that there is no parent terminal for Netscape (unlike the grep command). Processes without parent terminals are usually either system daemons or programs started by a user from icons in a GUI environment. The S indicates that the processes are currently sleeping. Most of the jobs on a system are sleeping at any given time. An R would indicate running; there are other states noted in the ps manpage.
Hint
You might also want to experiment with thepstreeutility. It provides a text-only tree-like display which helps to illustrate and visualize the relationships between the various running processes.
top commandTo run a continuous listing of processes, updated regularly with output sorted according to calling or runtime specification, top is the tool of choice for the command line. top is based upon processor activity. When the OpenLinux seems sluggish, run top in a terminal window to see just what job is stealing those precious cycles from your online gaming (ahem) spreadsheet recalculations. Additionally, top has runtime interactive commands to allow process manipulation and control.
top - Display top CPU processes
Usage : top [option...]
|
|
d N |
Specify refresh delay in seconds (display update rate) |
q |
Continuous refresh |
S |
List cumulative process time for job, including dead child processes |
s |
Run top in secure mode, disable some interactive controls |
N |
N iterations (refresh cycles), then terminate |
b |
Batch mode - non-interactive, useful for piping |
The available commands in interactive mode include k for killing processes and q to quit out of top. Others are listed in the manual page for top. Figure 17-5 shows a Konsole terminal window with top running.
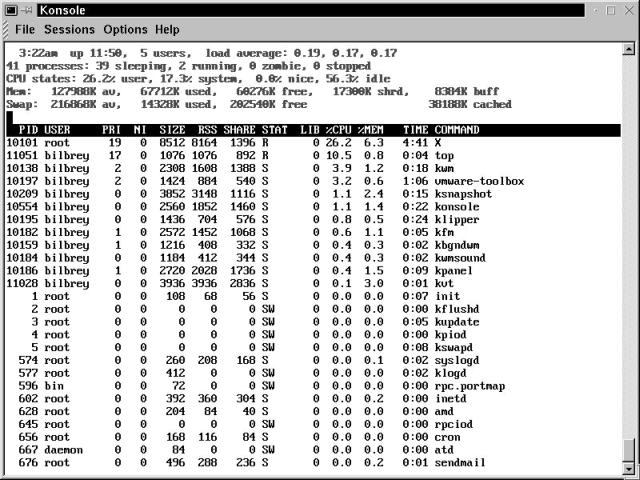
Figure 17-5
Typical top utility output
pidof utilitypidof is a utility that returns the process ID (pid) of a specified running file as output. We use this program both in scripts and on the command line.
pidof - Finds processes by name and lists their PIDs
Usage : pid [option...] name
|
|
-e |
|
-g |
Return process group ID rather than PID |
-V |
Return version information and exit |
name |
Name of command from running process list |
While the whole list of processes is available using the ps command, sometimes just getting the pid of a specific process is terribly useful. For example, assume that your Web browser software (say, a program called netscape) has locked up. There are a variety of methods to put Netscape out of its misery. Here's one (demonstrated in two steps) using pidof:
[bilbrey@bobo bilbrey]$ pidof netscape
1348

[bilbrey@bobo bilbrey]$ kill -9 `pidof netscape`
And the remains of the netscape process (and all its child processes) are toast. The first command simply demonstrated the output of pidof. The second command actually does the deed - putting pidof netscape in backquotes performs a command substitution that leads to a line which (behind the scenes) reads kill -9 1348. Voila.
crontab commandSuppose that each night, at the end of the evening, you create an archive file of everything you've worked on over the last 24 hours, then encrypt that archive and send it somewhere safe (that is, elsewhere) using e-mail. In another era, you would have at least created a batch file to accomplish most of the task with one command (or click). In Linux, create a script file specifying the actions to be done, and then tell the system to execute that script at a specific time each day (or each weekday). The execution is accomplished by the cron daemon. The user entries that cron executes on schedule are created with the crontab program.
[bilbrey@grendel bilbrey]$ crontab -l
# DO NOT EDIT THIS FILE - edit the master and reinstall.
# (/tmp/crontab.12168 installed on Thu Apr 27 11:26:11 2000)
# (Cron ver. -- $Id: crontab.c,v 2.13 1994/01/17 03:20:37 vixie Exp $)
5,35 * * * * /home/bilbrey/scripts/dostats >> /home/bilbrey/log
37 2 * * * /home/bilbrey/scripts/reindex >> /home/bilbrey/log
Above is a listing of an existing crontab file on a Web server machine called Grendel. The output shown has three comment lines - the first instructs us on what not to do. We will address editing the master shortly. The second line is the date and time of crontab installation. A crontab is reinstalled at each system boot. The third line gives information about the current running cron and crontab versions.
After the comments, each cron job entry starts with the date and time fields for scheduling, followed by the command line to execute. The fields may contain numbers as shown below, or an asterisk, meaning every time. The numbers may be specified individually, as ranges (for example: 8-11, implying 8, 9, 10,11) or as comma-separated lists.
This is how the various fields are specified:
minute 0-59
hour 0-23
day of month 1-31
month 1-12 (or names)
day of week 0-7 (0 and 7 are both Sunday, or use names)
5,35 * 1-31 * * /home/bilbrey/bin/dostats >> /var/log/httpd/statslog
It is easier to read the schedule back to front. Every day of the week, every month, on every day of the month, every hour, at 5 and 35 minutes past the hour, run the specified command. The 1-31 is equivalent to putting an asterisk in the day of the month column. In this case, the specified command runs the statistics for a Web server, and directs the output to a logfile. To edit your own crontab file, type crontab -e.
Additionally, the section 1 manpage for crontab has only part of the information needed to understand this program. To display more data, including sample crontab entries, type man 5 crontab. Start crontab without options or arguments to display a short help listing.
crontab - Maintain crontab files for individual users
Usage : crontab [-u username] [option...] filename
|
|
-u username |
Specify user's crontab file to edit (useful as superuser) |
-l |
Display current crontab contents |
-r |
Remove current crontab |
-e |
Edit user's existing crontab, use system editor (vim) |
filename |
Install crontab from contents of filename |
at commandFor actions that do not need to be run repeatedly, but do need to be run later, the at and batch commands are at your service. Fundamentally similar, at specifies the time at which to run a command, whereas batch specifies a system processor load level. This means that for all intents and purposes, batch is infrequently used on personal computers, but might frequently be invoked in a server environment. Complementary tools for the at facility include atq to see the list of pending commands, and atrm to remove a job from the list. More information about atq and atrm is available on the at manual page.
at - Queue jobs for later execution
Usage : at [option...] [command] TIME
|
|
-V |
Print version number to STDERR (often the screen) |
-q queue |
Specify the queue to place job in, from a to Z |
-m user |
Mail user when job is completed |
-f filename |
Read job from file |
-l |
Alias for atq command |
-d |
Alias for atrm command |
command |
Job to be executed at TIME, unless -f used |
TIME |
Specify time job is to run, many possible formats |
In the example that follows, we jest not. The specifications for time really are that flexible. Teatime translates to 4pm. See the at manual page for more information. Here we add a job, see it on the queue (default to the 'a' queue), and finally remove the job from the queue.
[bilbrey@bobo bilbrey]$ at -m -f incr.backup teatime
job 1 at 2000-05-02 16:00

[bilbrey@bobo bilbrey]$ atq
1    2000-05-02 16:00 a

[bilbrey@bobo bilbrey]$ atrm 1
screen commandAs an alternative to the job control features that are available through the shell, we present the screen program, the console jockey's miracle tool. You can start a screen session, then start a process, detach the session from the login session (still running), even log out and return to it later.
screen - Screen manager with VT100/ANSI terminal emulation
Usage : screen [option...] [command [args]]
|
|
-a |
Include all terminal capabilities, even if performance suffers as a result |
-A |
Adapt reattaching screens to current terminal size |
-d | -D pid.tty.host |
Detach a screen attached elsewhere, usually followed by reattaching locally (-D logs out remote screen) |
-D -RR |
Detach and reattach or start a fresh session |
-r |
Reattach to a detached screen process |
-ls | -list |
List screen processes running for current user |
command [args] |
Start a new screen running the specified command |
When screen is running, there are a variety of two keystroke commands that are initiated with a Ctrl+A. To enter screen command mode, where the many runtime features can be used, type Ctrl+A : to get a colon prompt at the bottom of the screen. Following are some examples; starting a screen and detaching it, listing and reattaching a screen:
[bilbrey@bobo bilbrey]$ screen ; screen

[bilbrey@bobo bilbrey]$ screen -list
There is a screen on:
       1800.pts-2.bobo (Attached)
1 Socket in /home/bilbrey/.screen.

[bilbrey@bobo bilbrey]$ screen -d
[remote detached]

[bilbrey@bobo bilbrey]$ screen -list
There is a screen on:
       1800.pts-2.bobo (Detached)
1 Socket in /home/bilbrey/.screen.

  *  *  *

[bilbrey@bobo bilbrey]$ screen -r 1800

[bilbrey@bobo bilbrey]$ screen -list
There is a screen on:
       1800.pts-2.bobo (Attached)
1 Socket in /home/bilbrey/.screen.
The key question, of course, is why bother? There are already consoles and virtual terminals. Why use screens? The single major advantage is the ability to detach a screen during a working session, logout, go someplace else, establish a new session, and reattach to the screen. Additionally, screen has multi-user capabilities that allow you to share a screen session with another user remotely - handy for remote configuration show-and-tell type operations.
There are a plethora of networking and networked communication commands available. This is because GNU/Linux is designed from the ground up as a multi-user, networked operating system. Communications between machines and effectively sharing resources is a core competency for Linux.
Most of these programs are really useful. A major drawback is that some of them are at the root of security holes, and should not be used (or even installed, arguably). The programs that were once in common use, and should now be removed and or otherwise disabled include: rlogin, rsh, rstat, ruptime, rcp, rusers, and rwall (as well as the corresponding system daemons). In Chapter 19, we discuss the reasons why. The following commands are in common, everyday use.
ftp commandftp is the most common utility for transferring large chunks of data across the Internet. ftp stands for File Transfer Protocol, has a small number of startup options and an armada of commands. We generally recommend only using ftp for anonymous file transfers, as the username and password exchange take place in the clear on the wire. See Chapter 22 for some more secure file transfer methods, like scp, a part of the SSH suite.
ftp - ARPANET file transfer program
Usage : ftp [option...] [host[:port]]
|
|
-d |
Enable debugging while running |
-g |
Disable file globbing (no file wildcard characters like *) |
-i |
Disable interactive prompts (don't ask for each transfer) |
-n |
No auto-login on initial connection (this option overrides the ~/.netrc configuration) |
-v |
Verbose - show all responses from remote server |
Once ftp is running, the prompt is ftp>, meaning that ftp is ready for command input. Table 17-3 lists a few of the commands used under ftp.
Table 17-3
Interactive commands for ftp
| Command | Description |
ascii |
Transfer using network ASCII mode (text files) |
binary | image |
Transfer using binary mode (images, binary formats) |
bye | exit | quit |
Terminate ftp operation |
cd remote-directory |
Change directories on the remote (server) machine |
cd local-directory |
lChange directories on the local (client) machine |
close | disconnect |
Close an open connection |
open host [:port] |
Initiate a new connection to remote host, optional port |
get filename |
Fetch a single file from server to client |
mget filenames |
Fetch multiple files, comma delineated or wildcard |
reget remote-file local-file |
Like get, except begin at end of local file - used for restarting dropped transfers. |
put | send filename |
Send a single file from client machine to server |
mput filenames |
Send multiple files, comma delineated or wildcard |
hash |
Toggle printing a # character with block transfer |
ls |
List contents of current remote directory |
|
Execute command in a sub-shell (then return to ftp) |
help command |
Print list of commands (or command specific help) |
! |
Escape to shell, type exit to return to ftp |
A sample ftp session follows: the initial command starts ftp, disables interactive prompting, and specifies the ftp server machine. Anonymous ftp login is a common mode for use in allowing guest users to access files from a specific public area without opening the server system to major security threats. The initial transfer mode is displayed directly above the ls command, usually the default mode is binary for a client on a Unix or Linux box, and ASCII on a Windows/DOS machine. Pay attention and set your transfer mode if necessary - downloading a 650MB ISO image in ASCII mode (that is, useless) is a mistake best made only once.
The mget command uses file globbing (file specification wildcard characters) to effectively say, "Get all the files that end in tgz." Each transfer displays information when the transfer connection is initiated, and again at completion. Note that these transfers were accomplished across a small Ethernet LAN (yielding a reasonably high transfer rate) - not a dialup connection.
[bilbrey@bobo bilbrey]$ ftp -i ftp.testnetwork.bogus
Connected to testnetwork.bogus.
220 grendel.testnetwork.bogus FTP server (Version wu-2.6.0(1)
Tue Oct 19 07:20:38 EST 1999) ready.
Name (ftp.testnetwork.bogus:bilbrey): anonymous
331 Guest login ok, send your complete e-mail address as password.
Password: yourname@yourdomain.com
230 Guest login ok, access restrictions apply.
Remote system type is UNIX.
Using binary mode to transfer files.
ftp> ls
200 PORT command successful.
150 Opening ASCII mode data connection for /bin/ls.
total 16359
-rw-r--r--   1 root     root     13361781 Jan 21 05:56 base2_2.tgz
d--x--x--x   2 root     root         1024 Dec 17 11:42 bin
-rw-r--r--   1 root     root      3316820 Jan 21 05:56 drivers.tgz
d--x--x--x   2 root     root         1024 Dec 17 11:42 etc
drwxr-xr-x   2 root     root         1024 Dec 17 11:42 lib
dr-xr-sr-x   2 root     ftp          1024 Jan 19 02:08 pub
226 Transfer complete.
ftp> mget *tgz
local: base2_2.tgz remote: base2_2.tgz
200 PORT command successful.
150 Opening BINARY mode data connection for base2_2.tgz
(13361781 bytes).
226 Transfer complete.
13361781 bytes received in 17.6 secs (7.4e+02 Kbytes/sec)
local: drivers.tgz remote: drivers.tgz
200 PORT command successful.
150 Opening BINARY mode data connection for drivers.tgz
(3316820 bytes).
226 Transfer complete.
3316820 bytes received in 4.55 secs (7.1e+02 Kbytes/sec)
ftp> bye
221-You have transferred 16678601 bytes in 2 files.
221-Total traffic for this session was 16679966 bytes in 4 transfers.
221-Thank you for using the FTP service on grendel.testnetwork.bogus.
221 Goodbye.

[bilbrey@bobo bilbrey]$
telnet commandThe telnet program opens a terminal session for remote login over a network or the Internet. Like ftp, usernames and passwords are transferred in clear text, so we advise using a secure method of logging into remote machines, such as SSH (detailed in Chapter 22). Security requires cooperation at both ends of the pipe, though. Some services that we get through ISPs only offer standard telnet shell accounts. Our only recommendation here: don't use the same username/password combination you use on any other systems, and store nothing confidential on a machine that can be accessed via telnet.
telnet - User interface to the TELNET protocol
Usage : telnet [options] [host [port]]
|
|
-8 |
Request full 8-bit operation |
-E |
Disable escape character functions (no command mode) |
-L |
Binary (8-bit) specified for output only |
-a |
Attempt automatic login, use local $USER shell variable |
-l username |
Specify username to return when remote system requests login name |
host [:port] |
Specify host (by name or IP) and optionally host:port (if not port 21, the default) |
There are a variety of commands to alter the mode of telnet's operation; these can be found on the manpages. We find that we use this program rarely, usually just long enough to get ssh installed, then we can log back in securely and change all the passwords. Below is a sample telnet session (executed prior to making the modifications we recommend in Chapter 21; while the default telnet port is still open with a system daemon listening).
[bilbrey@grendel bilbrey]$ telnet 192.168.0.5
Trying 192.168.0.5...
Connected to 192.168.0.5.
Escape character is '^]'.

Caldera OpenLinux(TM)
Version 2.4 eDesktop
Copyright 1996-2000 Caldera Systems, Inc.

login: bilbrey
Password: password
Last login: Sat Apr 29 16:19:28 2000 from grendel on 2

Welcome to your OpenLinux system!

[bilbrey@bobo bilbrey]$ ls Ch*
Chapter03  Chapter08  Chapter13      Chapter17  Chapter22
Chapter04  Chapter09  Chapter14      Chapter18  Chapter23
Chapter05  Chapter10  Chapter15      Chapter19  Chapter24
Chapter06  Chapter11  Chapter16      Chapter20  Chapter25
Chapter07  Chapter12  Chapter16.txt  Chapter21  Chapter26

[bilbrey@bobo bilbrey]$
finger commandfinger is still in occasional use, as a tool to acquire information about specified users on a remote system. Carried forward from Unix's origins as a corporate and academic campus networking OS, the finger service is usually disabled on machines connected to the Internet, since it presents an additional network opening into the system, a security risk.
finger - User information lookup program
Usage : finger [option...] [user[@host]]
|
|
-s |
Display short (one line) output about specified user |
-l |
Display long (multi-line) format (see examples) |
-p |
With -l, inhibit .plan and .project display |
-m |
Suppress user name (as opposed to user id) matching |
user [@host] |
Specify user (optionally user@host) to query |
.plan and .project are files that can be maintained in a user's home directory, and queried by finger. This is not particularly important since, as noted, we don't recommend running the finger daemon.
Sample output from a finger command follows this paragraph. There is rather more information there than most people want known. Also, finger is a great way to confirm the existence or non-existence of a specific username on a system. Run without arguments, finger lists information about all the current users of the local system. You can see why we don't like finger running on an Internet accessible system.
[bilbrey@grendel bilbrey]$ finger bilbrey@bobo.orbdesigns.com
[bobo]
Login: bilbrey                          Name: Brian Bilbrey
Directory: /home/bilbrey                Shell: /bin/bash
On since Sat Apr 29 14:53 (PDT) on :0 from console (messages off)
On since Sat Apr 29 15:35 (PDT) on pts/0   1 hour 6 minutes idle
On since Sat Apr 29 14:54 (PDT) on pts/1   3 minutes 8 seconds idle
Last login Sat Apr 29 16:20 (PDT) on 2 from grendel
No mail.
Plan:
04/22/2000  Chapter 16 will be completed this weekend.
04/22/2000  Chapter 16 will be completed this weekend.

[bilbrey@grendel bilbrey]$ finger syroid@bobo.orbdesigns.com
[bobo]
Login: syroid                           Name: Tom Syroid
Directory: /home/syroid                 Shell: /bin/bash
Last login Sun Apr 16 15:35 (PDT) on tty3
No mail.
No Plan.
talk commandThe talk command is the poor man's version of a chat session. Used on a single machine, talk can be a handy way to converse (short subject style) without running up massive phone bills. We use it by connecting our machines via ssh - an encrypted and compressed IP pipe. Raw talk can be used over the Internet, but we recommend against the use of the talk service on servers for security reasons.
talk - User information lookup program
Usage : talk user[@host] [ttyname]
|
|
user [@host] |
Specify user to talk with (optional host specification) |
ttyname |
When user is running multiply tty connections, ttyname permits selection of specific terminal to talk on. |
For the example shown in Figure 17-6, Brian typed talk syroid. The system prompted Tom to type talk bilbrey, and the session was underway.
Figure 17-6
A slightly imaginary talk session as seen in a Konsole terminal window
Creating, formatting, and printing text files in old-school Unix style is a very different experience from creating pre-designed, wysiwyg, and homogenized (for the consumer's safety, of course) documents in modern word processors. The command line procedures for production of the written word reach back to the roots of the Unix design philosophy - small well-designed tools to do one job and one job only, strung together to complete complex tasks. There are two major text processor formats/tools for use in GNU/Linux: groff and LaTeX.
groff commandgroff is the enhanced GNU version of the roff (from "runoff") tool, which was implemented on many *nix systems as troff (typesetter output) and nroff (line printer output). Manual pages are formatted for display with groff (along with many other uses that we do not address here). Figures 17-7 and 17-8 show groff input and groff output, using the which manual page as sample data.
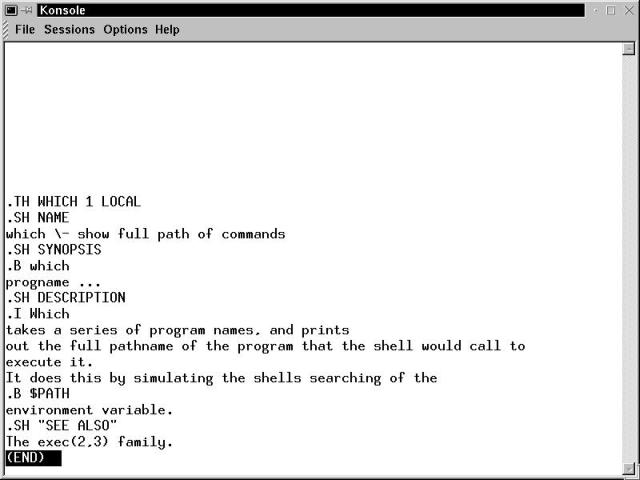
Figure 17-7
ASCII text with groff formatting codes for the which manual page.
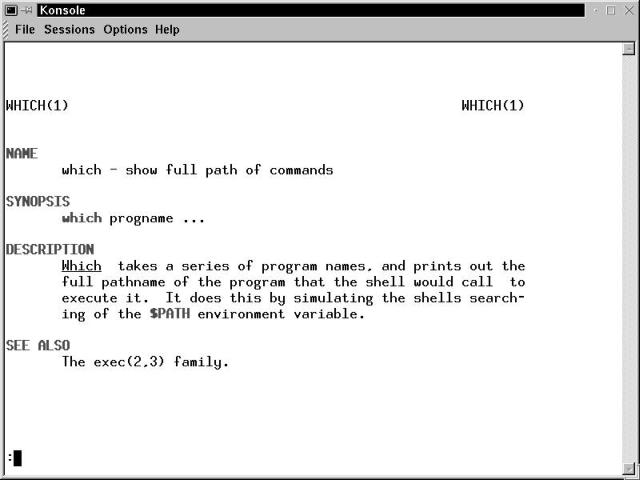
Figure 17-8
groff formatted text, displayed onscreen by the man command
LaTeX is a package of macros that overlay the TeX text processing system. TeX was designed by Donald Knuth to provide the typesetting capabilities he needed for formatting his series of books, The Art of Computer Programming.
latex - Structured text formatting and typesetting (see also elatex, lambda, and pdflatex)
Usage : latex filename
|
|
filename |
LaTeX formatted input file |
latex (the program) generates several files: an actual filename.dvi output file, a log file and an auxiliary file. LaTeX proper is a document markup language, similar in form (yet vastly different in the details) to HTML. Here is a short sample document called tfp.tex, formatted with LaTeX:
1   \documentclass[a4paper]{letter}
2   \address{1234 Easy Street \\
3            Sunnyvale, California 94087}
4   \signature{Brian Bilbrey}
5
6   \begin{document}
7   \begin{letter} {Tom Syroid \\
8                   987 Happy Way \\
9                   Saskatoon, SK S7N 1Z9}
10
11  \opening{Dear Tom,}
12
13  Here's the following - a first paragraph for the Text
14  Processing Commands section of Chapter 16. Please send
15  feedback soonest.
16
17  Creating, formatting and printing text files in old-school
18  Unix style is a very different experience from creating
19  pre-designed, wysiwyg, and homogenized (for the consumer's
20  safety) documents in modern word processors. The command
21  line procedures for production of the written word reach
22  back to the roots of the Unix design philosophy - small
23  well-designed tools to do one job and one job only, strung
24  together to complete complex tasks. There are two major
25  text processor formats/tools for use in GNU/Linux:
26  {\em groff} and \LaTeX\ .
27
28  \closing{Thanks,}
29
30  \end{letter}
31  \end{document}
(The line numbering is present for reference only - do not put line numbers in .tex files.)
Line 1 begins the process, setting up paper type and class of document, in this case a letter. Document classes set up macros for appropriate formatting of elements common to the class. In the case of letters, addresses, signatures, opening and closing blocks are frequent, so these macros are defined in and loaded by the letter class.
Some of the macro variables get loaded prior to document beginning, like address and signature, while others are formatted inline. Note the care that needs to be taken with nesting. The \begin and \end{letter} are fully contained by the \begin and \end{document} block.
Inline formatting of text is demonstrated on Line 26, where groff is emphasized, and LaTeX is substituted with the stylized LaTeX logo. The resulting product, a .dvi (device independent) file that can easily be translated to many different printer and screen formats, is shown in Figure 17-9. Observe that the date is inserted automatically (and without external reference in the .tex file, it's a part of the letter class definition) by the system.
Figure 17-9
xdvi program used to view tfp.dvi output from the Latex example.
When the example from the previous section is "compiled" by LaTeX into a device independent file (.dvi), that file still needs to be converted into a format that is useful for a specific printer. Often the best choice is PostScript. The dvips utility is invoked to convert the letter from above into a PostScript file suitable for printing.
dvips -o letter.ps tfp.dvi
The preceding example runs the dvips command, generating output to the letter.ps file (-o letter.ps), and taking tfp.dvi as input. Once the file is in Postscript form, it can be sent to the printer by typing lpr letter.ps.
There is a class of programs that are commonly referred to as filters. A filter takes one type of input, and generates another, either rearranging the input data, or selecting specific parts for output.
It rarely is as simple as that explanation, however. GNU/Linux tools are often designed to do one type of thing in several different ways, depending on requirements. You will see this metamorph type of behavior as we explore the following commands.
grep utilitygrep is a text searching utility and a remarkably versatile tool. First, the specification:
grep - Print lines matching a pattern
Usage : grep [options] - | filename(s)
|
|
-G |
Basic regular expression (regex) search - default |
-E |
Extended regex search (same as invoking egrep) |
-F |
Search from list of fixed strings (same as fgrep) |
-C N | N |
Print N lines of context before and after match (same as using -A N for after only and -B N for before only, -C N option never prints duplicate lines) |
-c | --count |
Suppress normal output, print count of matches instead |
-f | --file=filename |
Patterns to match in filename, one pattern per line |
-i | --ignore-case |
Make grep operation case-insensitive |
-n | --line-number |
Preface each match with its line number from input file |
-r | --recursive |
Read all files under each directory, recursively |
-s | --no-messages |
Suppress error output regarding non-existent files, and so on |
-w | --word-regexp |
Match whole words only |
-v | --invert-match |
Print non-matching lines |
--help |
Display help and exit |
-V | --version |
Show version information and exit |
Examples:
[bilbrey@bobo bilbrey]$ grep syroid *
Chapter16.txt:bilbrey bilbrey bilbrey syroid bilbrey
Chapter16.txt:syroid   tty3    Apr 16 15:35
letter.tex:\begin{letter} {Tom Syroid \\
   *   *   *
grep: Desktop: Is a directory
grep: nsmail: Is a directory

[bilbrey@grendel bilbrey]$ ps -ax | grep net | sort
  603 ?     S  0:00 inetd
10808 ?     S  0.05 /opt/netscape/communicator/netscape
10818 pts/1 S  0:00 grep net

[bilbrey@grendel bilbrey]$ ps -ax | grep -w net | sort
10824 pts/1 S  0:00 grep net

[bilbrey@grendel bilbrey]$ grep -C1 "[Ss]mall.*tool" letter.tex
of the written word reach back to the roots of the Unix design
philosophy - small well-designed tools to do one job and one job
only, strung together to complete complex tasks. There are two
The first example, grep syroid *, looks for the string "syroid" in all of the files in the current directory. Some of the output has been removed from the example to show the error messages at the bottom - directories are not searched (unless recursion is invoked with the -r option).
The second example demonstrates the filter capabilities of grep, with the output of the ps -ax command being piped into grep, which searches for the string net, and sends its output on to sort which then send the sorted list to the display. The sort is line-based, yielding a list of "net" included lines sorted by process ID. Running the same command with the -w option added into the grep call shows how word-based searching affects the output, in the third example.
The last example is more complex. The -C1 option specifies one line above and below for context. The pattern to search on this time is not a simple string, but a regular expression, which specifies that the string "Small" or "small" with any text intervening, terminated with the string "tool" creates a match. The file to be searched is called letter.tex. To learn more about this aspect of pattern matching, see the "Regular Expressions" section, immediately following.
grep has two other invocations, egrep and fgrep, which are identical to calling grep -E and grep -F, respectively. These are commonly run from scripts.
Regular expressions are also called text patterns, or more colloquially, regex's. A regex is a way to specify a string or set of strings without having to type, or necessarily even know, the entire content of the matching string. Variable matching is achieved by use of metacharacters, which are listed in Table 17-4
Table 17-4
Regular Expression Searching Metacharacters
| Character(s) | Description |
. |
Match any single character (except newline) |
* |
Match zero or more of the preceding character |
^ |
Regex following matches at beginning of line |
$ |
Regex preceding matches at end of line |
[ ] |
Match any of the enclosed characters (or range, hyphen separated), to include ] or -, put first in list, like this: []a-d] matches any of ], a, b, c, or d |
[^ ] |
Inverse of above - match any character not in list |
\{n,m\} |
Match preceding character exactly n times (with just n), at least n times (with n,) , or between n and m times inclusive (with n,m) |
\ |
Quote following character (metacharacters in pattern) |
\( \) |
Save enclosed match string in holding variable for use in substitutions |
\< \> |
Match beginning and end of word, respectively |
+ |
Match one or more instances of preceding regex |
? |
Match zero or one instance of preceding regex |
| |
Match specified regex, before or after |
( ) |
Regular expression logical grouping |
The search and replace (pattern substitution metacharacters) listed in Table 17-5 are used in scripting languages such as sed, awk, or Perl to perform text substitution based on regular expression searches. This is addressed in more detail in Chapter 18.
Table 17-5
Pattern Substitution Metacharacters
| Character(s) | Description |
\n |
Substitution, restore the nth pattern saved with string enclosed by \( \), as noted previously. ALERT: Observe the difference between MS Mincho (above), and times new roman below. The backslash character is WRONG in the above. Please be aware. NOTE: The below is a repeat. Keep only the lower text. |
& |
Reuse search pattern as part of replacement string |
- |
Reuse previous replacement pattern in current replacement pattern |
\u |
Convert first character of replacement to uppercase |
\U |
Convert whole replacement pattern to uppercase |
\l |
Convert first character of replacement to lowercase |
\L |
Convert whole replacement pattern to lowercase |
Following are a few examples of pattern matches:
penguin A plain string, matches penguin
herring$ Matches herring at the end of a line
[Cc]aldera Matches Caldera or caldera
[^Bb]ald Matches anything but bald or Bald
[Nn]ew.*[Ll]inux Matches new linux, New Linux, New and improved GNU/Linux, and so on
Often, regular expressions are enclosed in quotes on the command line to keep bash from attempting to perform filename expansion on the regex.
More Regular Expression Resources
System Resources
man grep and man perlre both yield good information on regular expressions.Online Resources
http://bau.cba.uh.edu:80/CGITutorial/pattern.html is a good basic regular expression tutorial buried in a reference on CGI.Print Resources
Mastering Regular Expressions: Powerful Techniques for Perl and Other Tools Jeffrey E. Friedl (Editor), Andy Oram (Editor); O'Reilly and Associates
sort commandThe sort program offers multi-field multi-file sort functionality. sort is usually invoked as a filter, with input either from other programs, or from a file or group of files.
sort - Sort lines of text files
Usage : sort [options ...] - | filename(s)
|
|
-b |
Ignore leading blanks |
-d |
Sort only on [a-zA-Z0-9 ] |
-f |
Consider all alpha characters as uppercase for sort |
-g |
Sort by general numeric value (implicit -b) |
-r |
Inverted sort (descending) |
-o outfile |
Send results to outfile instead of STDOUT (the screen, by default) |
--help |
Display help and exit |
-V | --version |
Show version information and exit |
- |
Take input from STDIN |
filename(s) |
Sort file(s), concatenate then sort if multiple |
Examine the output of the ps -aux command (well, at least a portion thereof):
[bilbrey@bobo bilbrey]$ ps -aux
USER     PID %CPU %MEM   VSZ  RSS TTY   STAT   START . . .
root       1  0.3  0.0  1100  440 ?     S      09:49 . . .
root       1  0.0  0.0     0    0 ?     SW     09:49 . . .
root       1  0.0  0.0     0    0 ?     SW     09:49 . . .
root       1  0.0  0.0     0    0 ?     SW     09:49 . . .
And so on. A plain vanilla sort on that output yields the following:
[bilbrey@bobo bilbrey]$ ps -aux | sort
USER     PID %CPU %MEM   VSZ  RSS TTY   STAT   START . . .
bilbrey  857  0.0  3.4  6348 4352 ?     S      09:53 . . .
bilbrey  878  0.0  2.8  6160 3676 ?     S      09:53 . . .
bilbrey  898  0.0  1.2     0    0 ?     Z      09:53 . . .
bilbrey  899  0.0  0.0  1860 1064 pts/0 S      09:53 . . .
This puts the user bilbrey up at the top of the list, which may be useful, especially if you are bilbrey. What if the requirement is to understand which processes are using the most memory? Well, note that the fourth field is %MEM. So try a sort like this (remember that the fourth field is the first plus three):
[bilbrey@bobo bilbrey]$ ps -aux | sort -r +3
root     818  1.3  4.5  9688 5876 ?     S      09:51 . . .
bilbrey  915  0.0  3.4  6816 4384 ?     S      09:53 . . .
bilbrey  933  0.0  3.4  6800 4392 pts/0 S      09:53 . . .
bilbrey  857  0.0  3.4  6348 4352 ?     S      09:53 . . .
Now that's more like it. Observe that the column headers have been sorted right out of view in this abbreviated listing. The number one memory-using process on this system, taking nearly 5 percent of the memory of this running OpenLinux system is . . . pushed right off the edge of the page by the width of the line. The hidden answer is /usr/X11R6/bin/X. No big surprise there - GUI's are resource hogs.
Learn more about sort by having a look at the manual page. Like the other commands in this chapter, we don't have the space to be exhaustive. Instead, we can merely attempt to whet your appetite for learning and adventure.
There are a number of other filters, many of which are used frequently in scripts, and less so on the command line. What usually distinguishes a filter is that it can work non-interactively, accept its input from a file or from STDIN (keyboard or piped input), and it sends it's output to STDOUT (the display, usually) by default. Some programs that you might imagine only make sense in interactive mode, have a filter function of some kind. Here's a short list of a few more filter programs:
pr Paginate or columnize a file prior to printing
rev Reverses lines from input
tr Translate filter (for example, tr a-z A-Z to uppercase all input)
look Outputs lines which begin with specified string, requires a pre-sorted file for correct operation
uniq Removes the duplicate lines from a sorted file.
tac The complement of cat, concatenate the input files and print out in reverse order
Printing from the command line is rather boring. Once things are set up right, printing just works. Printer setup can be a bit exasperating, depending upon your requirements - see Chapter 3 if your printer isn't up and running yet.
lpr commandTo send a file to the default printer, type lpr filename. Many of the available options need to be understood by knowing that lpr is designed for a high-use, high-availability networked printing environment. lpr and friends access the printing facilities courtesy of the lpd daemon. We only show a few of the options below.
lpr - print files
Usage : lpr [options ...] - | filename ...
|
|
-P printer |
When multiple printers are available for use, especially in a networked environment - Available printers are listed in /etc/printcap |
-K | -# N |
Direct spooler to print N copies |
-m user |
Send mail to user on successful completion |
-h |
Suppress print header or banner (usually default) |
filename ... |
File(s) to be spooled for printing |
The following example demonstrates starting a job to print two copies of the file draft.ps, then examining the contents of the print queue.
[bilbrey@bobo bilbrey]$ lpr -P Epson -K2 draft.ps

[bilbrey@bobo bilbrey]$ lpq
Printer: Epson@bobo
 Queue: 1 printable job
 Server: pid 13391 active
 Unspooler: pid 13393 active
 Status: printed all 163086 bytes at 16:47:10
 Rank   Owner/ID         Class Job  Files       Size Time
active  bilbrey@bobo+390    A  390  draft.ps  163086 16:47:10
lpq commandThe lpq utility is demonstrated in the preceding example. When invoked, lpq requests a status report from lpd (the print spool daemon) on specified jobs or printers.
lpq - Spool queue examination program
Usage : lpq [options ...]
|
|
-V |
Print version information (LPRng server version) |
-a |
All printers as listed in /etc/printcap are reported |
-l |
Increase verbosity (-llll displays far more information) |
-P |
printer Address printer queue |
-s |
Short report, single line per queue |
jobid |
Report on specific jobid (in the preceding example: 390) |
-t N |
Keep running, display fresh info at N second intervals |
The following example demonstrates starting a job to print two copies of the file draft.ps, then examining the contents of the print queue.
[bilbrey@bobo bilbrey]$ lpq -s -P Epson
Epson@bobo  1 job
lprm commandWe've discussed putting files on the print queue with lpr, and monitoring the queue with lpq. What happens when you mistakenly send 400 copies of a tasteless joke to the printer outside the CEO's office? Remove the last 399 copies from the queue using the lprm command, then hustle over there and grab the one that is currently printing.
Normal users may see all of the contents of a queue, but can only remove their own jobs. Don't be fooled by the description from the manual page - lprm works for all queues, not just spools for a line printer.
lprm - Remove jobs from the line printer spooling queue
Usage : lprm [options ...]
|
|
-V |
Print version information plus verbose output |
-a |
Remove files from all queues available to user |
-P printer |
Remove from specified printer queue |
|
|
The following example uses lprm to kill a job in progress. Note that the subserver process that was spawned to despool the job to the printer device is explicitly terminated when the job is killed.
[bilbrey@bobo bilbrey]$ lprm -P Epson
Printer Epson@bobo:
checking 'bilbrey@bobo+539'
  checking perms 'bilbrey@bobo+539'
  dequeued 'bilbrey@bobo+539'
killing subserver '13542'
Hint
From the keyboard of Kurt Wall, our tireless Technical Editor: "lpr can be somewhat less than optimal for printing plain text files. For that purpose, I heartily recommend enscript." We haven't had much experience with this command, although the Kedit program makes use of it. Typeman enscriptfor all the details.
The number-one application on computers world wide, according to some pundits, is e-mail. The original purpose of ARPAnet, the progenitor of the Internet, was to connect government, academic, and corporate researchers via electronic mail. There are many, many utilities for reading, composing, and sending e-mail from the command line.
Distributed with OpenLinux is the original, basic mail program, and a full-featured command line mail tool called mutt. Additionally, there are other programs that can be downloaded and installed from the Internet, such as elm and pine (neither of which we discuss here). Additionally, there are other tools, such as biff, to notify a user when mail arrives, and fetchmail, to retrieve mail from POP, IMAP, or ETRN mail servers.
mail commandmail is an old, superficially simple tool for reading and writing e-mail. There are few options and commands. mail does not handle attachments natively. For message composition and reading, a vi-like interface can be invoked. While not terribly intuitive, mail can get the job done in some cases. We find that mail is good for jotting a quick note to another user on the same system or network and for sending notifications out of system scripts. We rarely use mail as a client, however.
mail - Send and receive mail
Usage : mail [options ...]
|
|
-v |
Enable verbose operation, delivery details, and more |
-n |
Don't read configuration file /etc/mail.rc on startup |
-N |
Don't display message headers initially |
-s text |
Specify subject on command line |
-c list |
Cc: to list of users |
-blist |
Bcc: to list of users |
-f filename |
Open mailbox (or specified file instead) for mail processing |
-u |
Equivalent to typing mail -f /var/spool/mail/user |
user ... |
Address new email to user(s) |
[bilbrey@bobo bilbrey]$ mail syroid -s"Chapter 16 is about done"
~v
The tilde (~) is the mail utility's command escape character; it prefaces every command character sent to mail. Pressing tilde followed by v opens visual mode for editing the outgoing mail. (See Figure 17-10 for a view of the mail editor open in a Konsole window.) The interface is vi/vim (discussed in Chapter 16). -Here are a couple of quick tricks: I or A to edit (putting the --INSERT-- in the status line at the bottom), arrow keys to navigate, Escape to return to command mode, and type :wq to commit the message you've typed and exit the editor. Then press Ctrl+d to close the message and send it. Read the mail manual page for all the details.
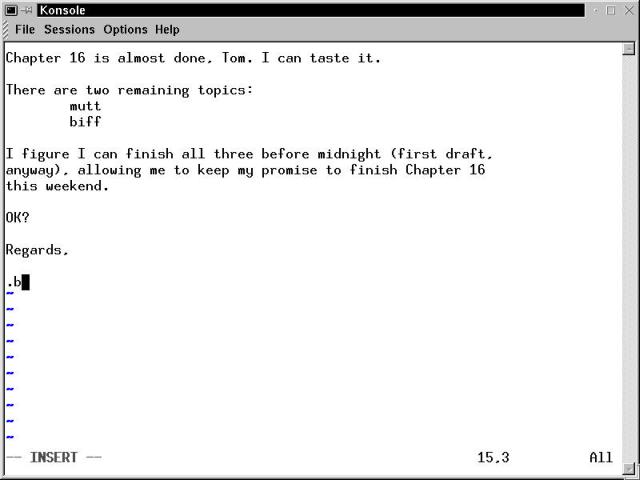
Figure 17-10
mail program running in visual mode to write a new email.
muttAs we noted in the beginning of this section, there are a plethora of mail tools available in GNU/Linux application space. mutt is an excellent MUA (Mail User Agent), and is the other text mail client packaged with OpenLinux.
In addition to enhanced functionality for the feature set supported by mail, mutt handles MIME (Multipurpose Internet Mail Extensions) encoded attachments and is proficient at handling threaded mail. It is PGP, POP3, and IMAP aware (we will look harder at those acronym-strewn security and mail server protocols in later chapters). It was written to follow the user interface of the older elm tool, and has since "borrowed" features from pine and mush, leading to the obvious name for a hybridized mail program, mutt.
A Comment from our Technical Editor...
Mike Elkins writes, "All mail clients suck. mutt sucks less." Love that.
mutt - The mutt mail user agent
Usage : mutt [recipient] [options ...]
|
|
-a filename |
Attach filename to message |
-b recipient |
Bcc: recipient |
-c recipient |
Cc: recipient |
-f mailbox |
Specify mailbox file to load |
-F rcfile |
Specify alternate configuration file (other than ~/.muttrc) |
-h |
Print about 40 lines of help |
-H filename |
Open a draft (template) file to use for header and body |
-i filename |
Include specified file in body of message |
-s subject |
Enter subject on the command line (hint: use quotes if the subject is longer than one word) |
recipient |
To: recipient |
Figure 17-11 shows a mutt screen, following message composition. The various header fields can be reviewed and changed. There is a key to the most common commands in the header line. Press ? to get a list of the 30 or so commands available.
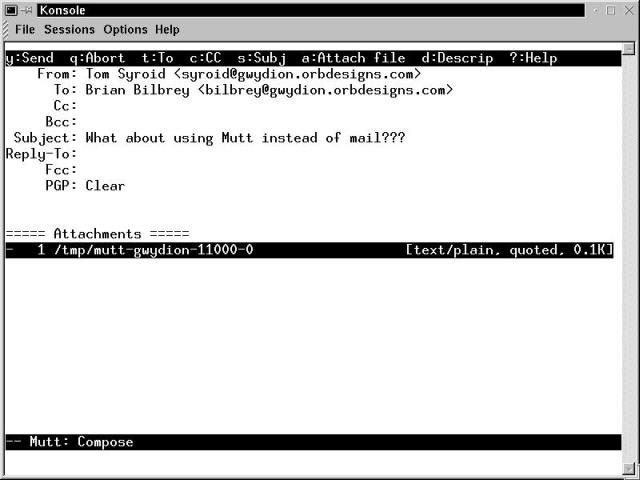
Figure 17-11
The compose view of a message ready to send from mutt.
In Figure 17-12, a full message edit is in progress. Headers can be displayed in a message during composition, as shown. The route to get there is non-intuitive though. Once editing is started, type Escape followed by :wq to get to a Mutt: Compose screen similar to that in Figure 17-11 previously. Then press E (uppercase E, please), and the message, including header information, is presented in the edit window.

Figure 17-12
vi message editor window invoked by mutt, with header information shown.
Aside from the mutt manual (referenced in Figure 17-12), there are a number of online resources available. Start at http://www.mutt.org/. To make mutt work with the message signing and encryption capabilities of PGP or GnuPG, have a gander at http://www.linuxdoc.org/HOWTO/Mutt-GnuPG-PGP-HOWTO.html.
biff commandbiff is a small utility to notify the user when an incoming message is received by the user's system mailbox. Notification occurs whenever a terminal update occurs, usually when a command is entered or completed.
Warning
Typed without arguments, biff is supposed to return "is y" or "is n" to reflect biff status for the user. Oddly, when multiple virtual terminals are open, biff only reports "is y" in the window biff was activated in. All terminals will report a new message, though.
biff - be notified if mail arrives and who it is from
Usage : biff [ny]
|
|
y |
Enable notification |
n |
Disable notification |
Example:
[bilbrey@bobo bilbrey]$ biff y
You have new mail in /var/spool/mail/bilbrey
In this example, immediately upon activating biff, a new message is detected and notice is printed to the terminal.
As we noted at the beginning of this chapter, there are over 1,800 user-space commands available with a full installation of OpenLinux. There are thousands more, a click or six away on the Internet. We only cover a miniscule proto-fraction. These commands are designed to begin weaning you from sole dependence on a GUI environment. By all means, use graphical tools when it makes sense. On the command line, there are features and utilities that are subtle and powerful. With the tools we have given you, explore, learn, and begin to master the command line environment. The payoff continues just around the corner, in Chapters 18 (Scripting) and 19 (System Administration).
This chapter covered the following points:
Go to the Table Of Contents