Open the Create Clock Constraint dialog box using one of the following methods:
From the Actions menu, choose Constraints > Clock.
Click the
 icon.
icon.
Right-click the Clock in the Constraint Browser.
Specifying clock constraints is the most effective way of constraining and verifying the timing behavior of a sequential design. Use clock constraints to meet your performance goals.
To specify a clock constraint:
Open the Create Clock Constraint dialog box using one of the following methods:
From the Actions menu, choose Constraints > Clock.
Click the  icon.
icon.
Right-click the Clock in the Constraint Browser.
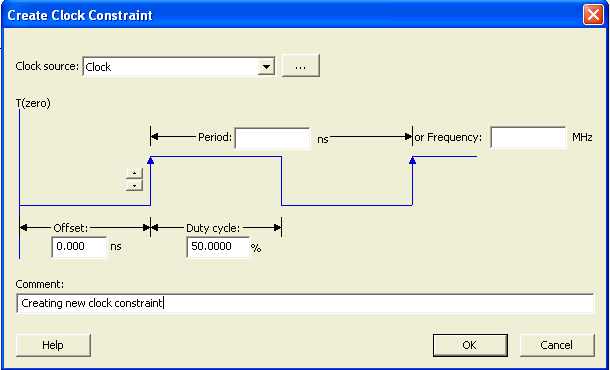
The Create Clock Constraint dialog box appears.

Create Clock Constraint Dialog Box
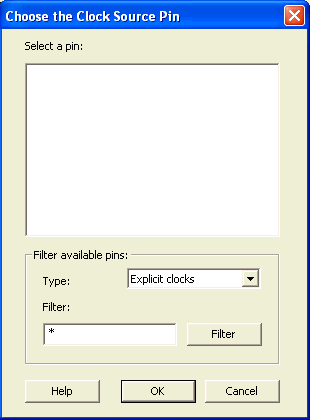
Select the pin to use as the clock source. You can click the Browse button to display the Choose the Clock Source Pin dialog box.

Choose Clock Source Pin Dialog Box
Use the Choose the Clock Source Pin dialog box to display a list of source pins from which you can choose. By default, it displays the explicit clock sources of the design. To choose other pins in the design as clock source pins, select Potential clocks or Clock networks in the Type drop-down list. To display a subset of the displayed clock source pins, you can create and apply a filter.
Click OK to save these dialog box settings.
Specify the Period in nanoseconds (ns) or Frequency in megahertz (MHz).
Modify the Duty cycle, if needed.
Modify the Offset of the clock, if needed.
Modify the first edge direction of the clock, if needed.
Click OK. The new constraint appears in the Constraints List.
Note: When you choose File > Commit, SmartTime saves the newly created constraint in the database.

SmartTime Timing Constraint View