The procedure for manually assigning technologies to I/O banks differs depending on whether you are designing for Fusion, ProASIC3E, ProASIC3, or Axcelerator devices.
To assign technologies to I/O banks in Axcelerator and ProASIC3E devices:
Select an I/O bank in either ChipPlanner or PinEditor.
From the Edit menu, choose I/O Bank Settings.
In the I/O
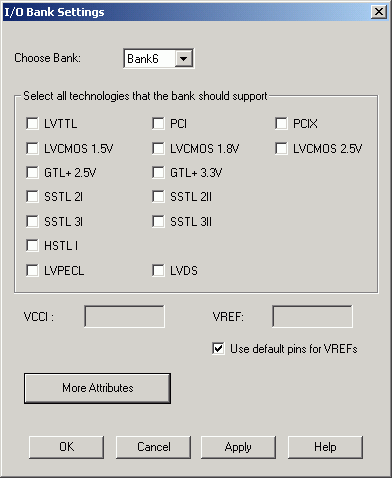
Bank Settings dialog box, select the technologies, and click Apply.
Selecting a standard selects all compatible standards and grays out
incompatible ones. For example, selecting LVTTL also selects PCI, PCIX,
and LVPECL, since they all have the same VCCI. Further, selecting GTLP
(3.3V) disables SSTL3 as an option because the VREFs of the two are not
the same. Once you click Apply,
the I/O bank is assigned the selected standards. Any I/O of the selected
types can now be assigned to that I/O bank. Any previously assigned I/Os
in the bank that are no longer compatible with the standards applied are
unassigned.
Click More Attributes to set the low-power mode and input delay. (These attributes are not supported in RTAXS, ProASIC3, and ProASIC3E devices.)
Assign I/O standards to other banks by selecting the banks from the list and assigning standards. Any banks not assigned I/O standards use the default standard selected in the Device Selection Wizard.
Leave the Use
default pins for VREFs option selected to set default VREF pins
and unset non-default VREF pins. If
you unselect this option when setting a new VREF technology, no VREF pins
are set. If you unselect this option when default VREF pins are already
set, it unsets them.
If the Use default pins for VREFs
option is selected when you click OK
or Apply, the software: 1) determines
if setting default VREF pins causes any I/O macros to become unassigned,
and if so, displays a warning message enabling you to cancel this operation,
2) determines if unsetting non-default VREF pins causes any I/O macros
to become unassigned, and if so, displays a warning message enabling you
to cancel this operation, and 3) sets default VREF pins and unsets non-default
VREF pins.
Click OK. Using PinEditor, proceed to assign I/Os with the same standards to the appropriate banks.

I/O Bank Settings Dialog Box for ProASIC3E and Axcelerator Devices
If VREF pins can be assigned, you must assign at least one VREF pin before running Layout.
Note: If you use I/O standards that need reference voltage, make sure to assign VREF pins. Actel strongly recommends you use the defaults. VREF pins appear in red in ChipPlanner and are labeled VREF in PinEditor.
To set the low-power mode and input delay (for Axcelerator devices only):
Click More Attributes in the I/O Bank Settings dialog box.
Drag the slider bar to the desired delay. The delay is bank specific.
Click View All Delays to see all the delay values (Best, Worst, Typical, Rise-Rise, Fall-Fall) for the input delay selected. You must select a technology to see the input delays.
Click OK.

Other I/O Bank Attributes Dialog Box
Note: Low-Power Mode and Input Delay are not supported in RTAX-S, ProASIC3, and ProASIC3E devices.
To assign technologies to I/O banks in ProASIC3 devices:
Select an I/O bank in either ChipPlanner or PinEditor.
From the Edit menu, choose I/O Bank Settings.
In the I/O
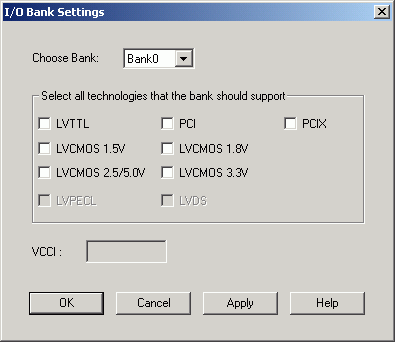
Bank Settings dialog box, select the technologies, and click Apply.
Selecting a standard selects all compatible standards and grays out
incompatible ones. For example, selecting LVTTL also selects PCI, PCIX,
and LVPECL, since they all have the same VCCI. Note that LVDS is available
only for banks 1 and 3. Once you click Apply,
the I/O bank is assigned the selected standards. Any I/O of the selected
types can now be assigned to that I/O bank. Any previously assigned I/Os
in the bank that are no longer compatible with the standards applied are
unassigned.
Assign I/O standards to other banks by selecting the banks from the list and assigning standards. Any banks not assigned I/O standards use the default standard selected in the Device Selection Wizard.
Click OK. Using PinEditor, proceed to assign I/Os with the same standards to the appropriate banks.

I/O Bank Settings Dialog Box for ProASIC3 Devices
Note: You cannot assign VREF pins in ProASIC3 devices.